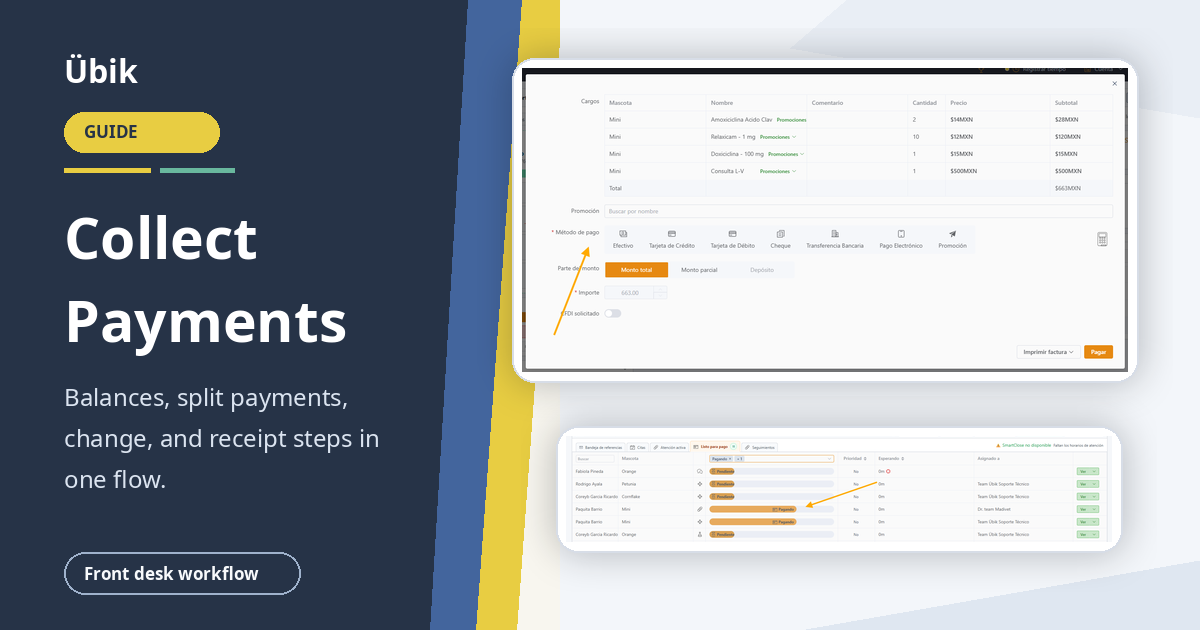
Collect an Appointment Payment From Reception in Ubik
After the medical, grooming, boarding, or hospitalization team finishes care, reception is responsible for reviewing what the client owes and recording the payment correctly.
This guide explains how to find the appointment, confirm the balance, choose whether to pay related appointments, use one or more payment methods, calculate cash change, and deliver the receipt.
1. Open Ready for Payment
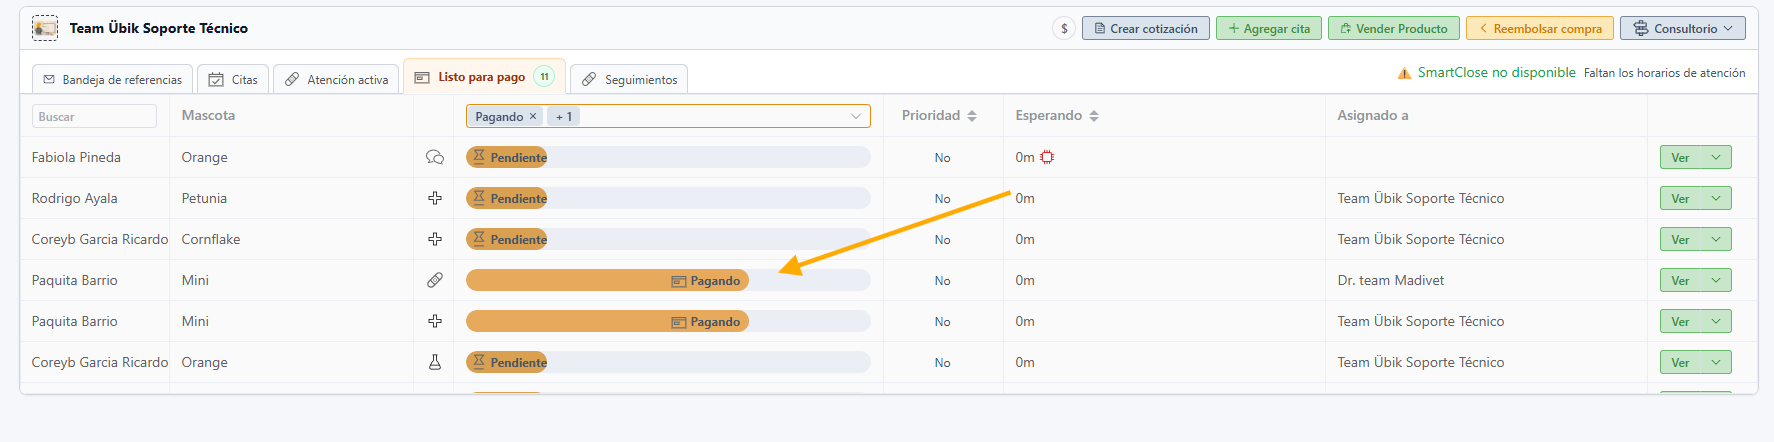
From the Reception Portal, select Ready for Payment.
By default, this section shows appointments in Paying status: patients whose care has finished and who were sent to reception for checkout.
Use Filters When the Appointment Is Missing
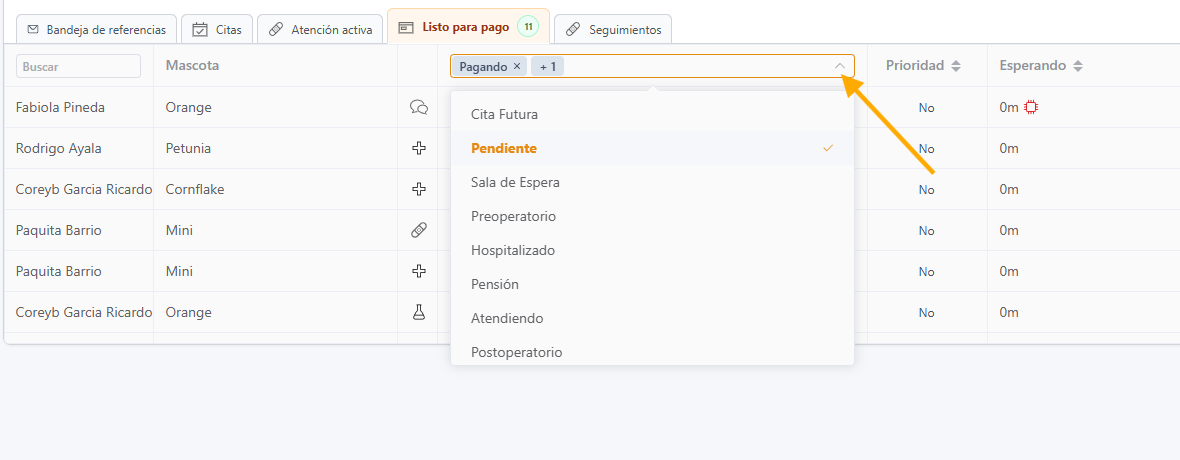
Sometimes doctors, groomers, or technicians may say they sent the appointment to payment, but reception cannot see it because the appointment status was not actually changed to Paying.
When that happens, use the filters in this section to search for appointments in other statuses.
2. Find the Appointment
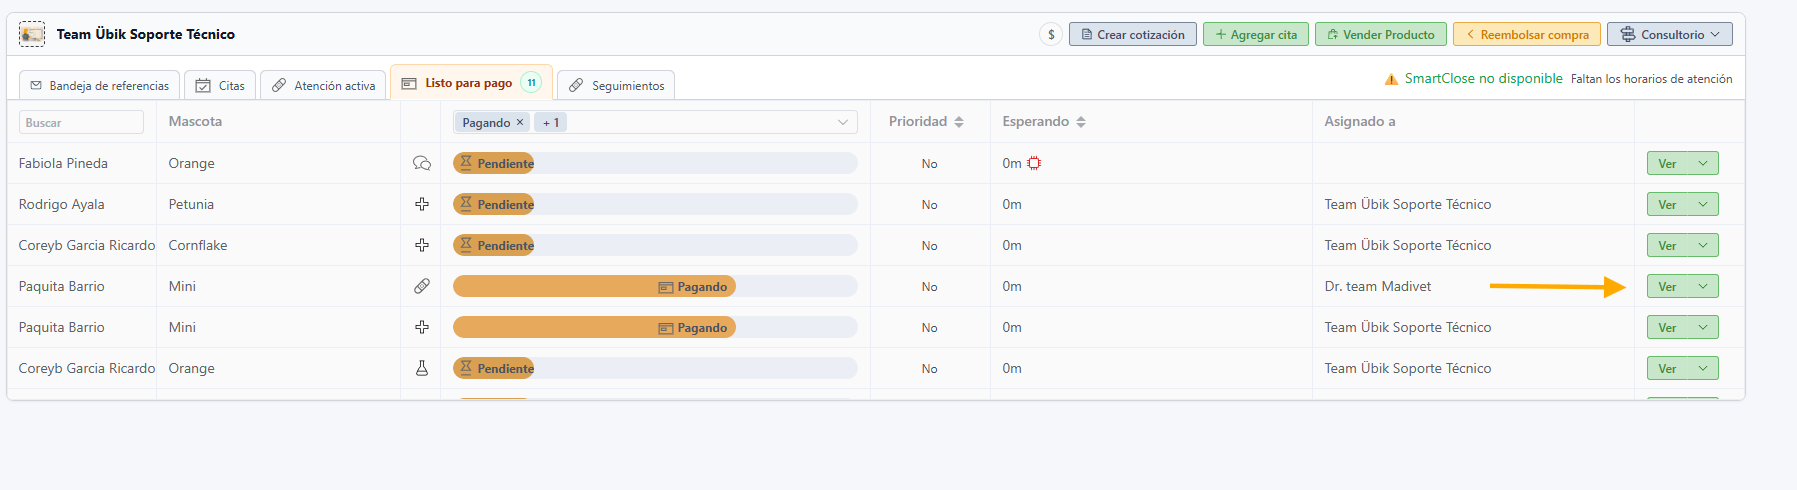
Find the patient appointment you need to charge.
After you find it, click the green View button.
3. Review the Appointment Balance
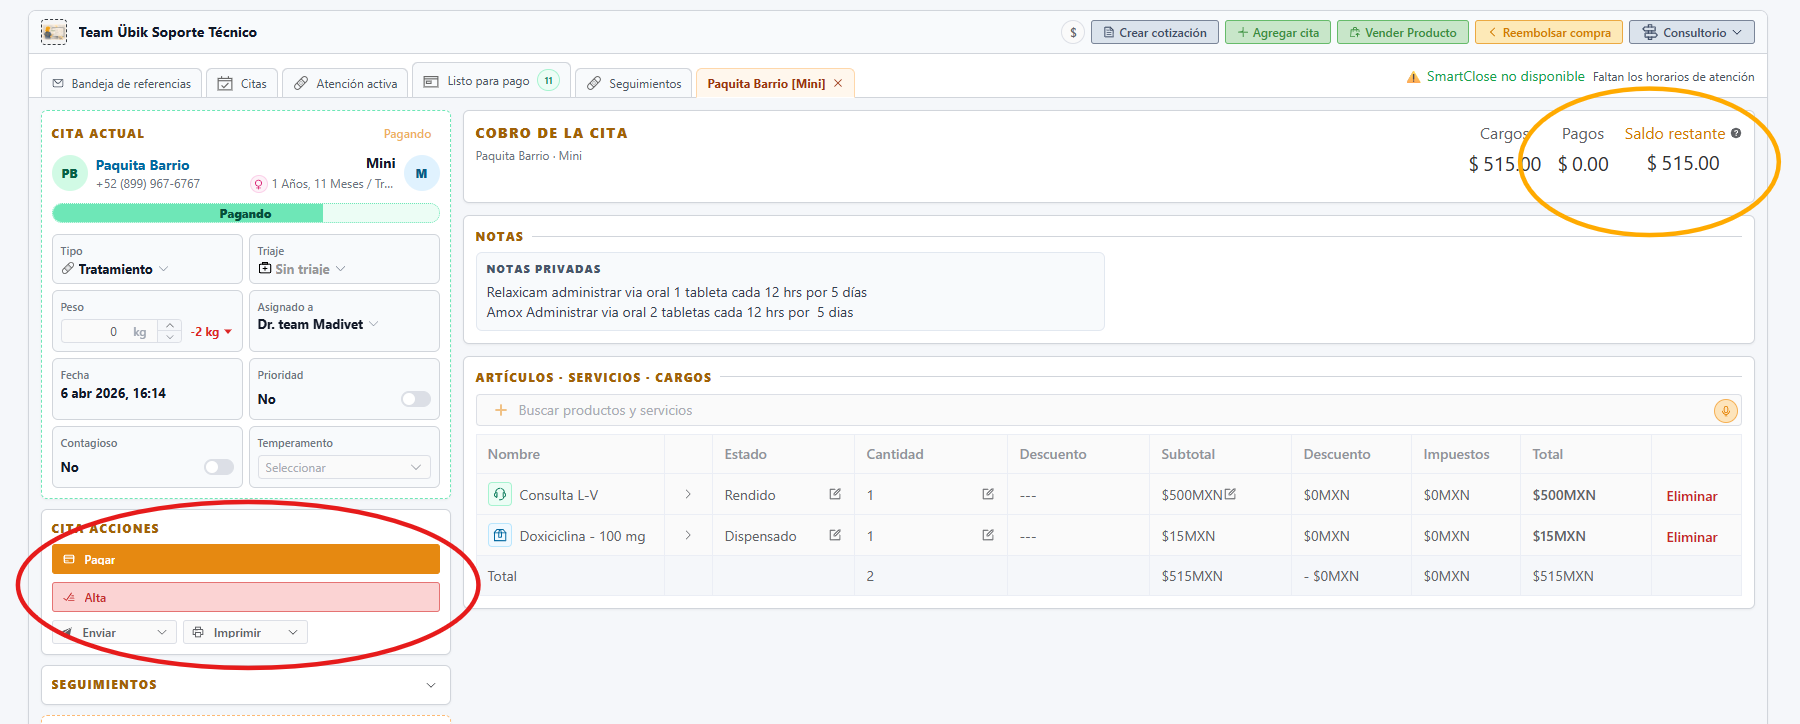
When you click View, Ubik opens the appointment page.
Before collecting payment, identify:
- The remaining appointment balance.
- The Actions section under the patient information.
- The Pay button inside that section.
Click Pay to begin checkout.
4. Choose Which Appointments the Client Wants to Pay
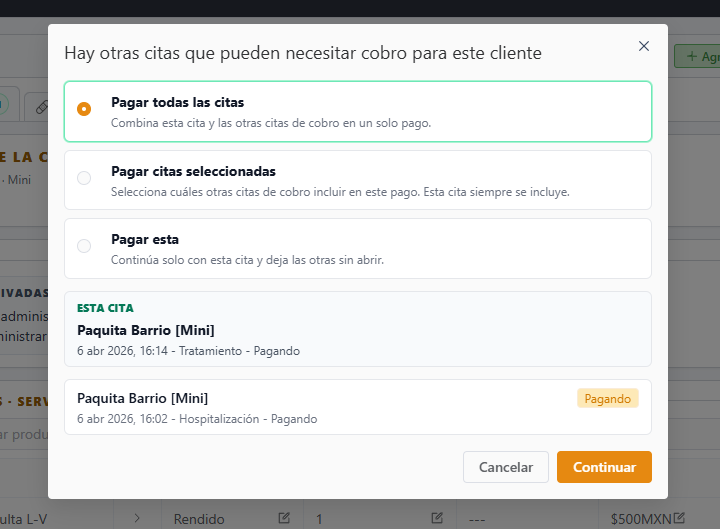
If the client has other open appointments with a remaining balance, Ubik may show a message that there are other appointments that may need payment for this client.
At that point, choose the correct option:
- Pay all appointments: Ubik automatically selects all open appointments for the client that have a remaining balance.
- Pay selected appointments: reception chooses exactly which pending appointments the client wants to pay.
- Pay only this appointment: checkout continues only for the appointment currently open.
Select the correct option and click Continue.
5. Select the Payment Method
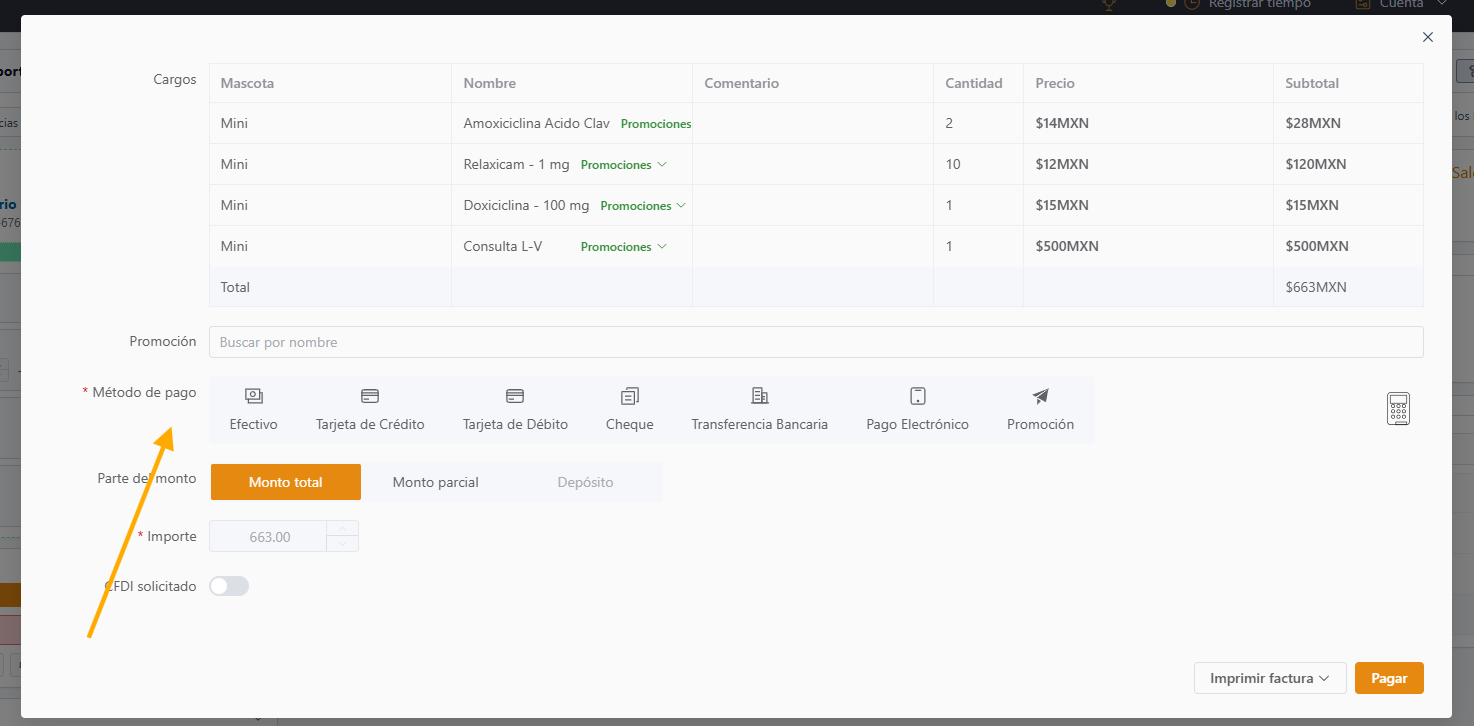
The payment window opens next.
Select the payment method the client is using and verify the amount that will be charged.
If the client will pay the full balance with one payment method, enter the payment details and click Pay. Ubik records the payment and opens the receipt automatically.
6. Register Partial Payments or Multiple Payment Methods
A client can use more than one payment method to cover the balance. For example, they may pay part in cash and the rest by card.
To split the payment:
- Select the first payment method.
- Enter the amount paid with that method.
- Click Pay.
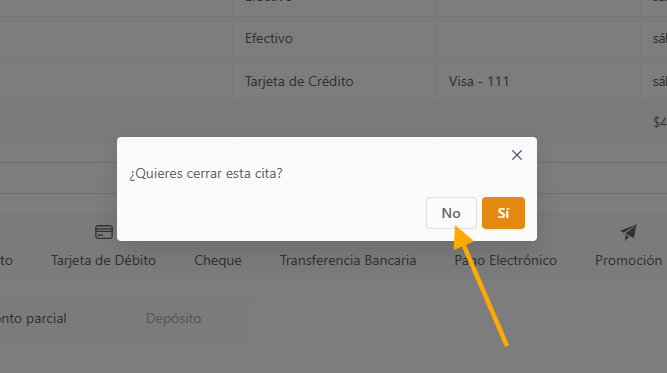
- When Ubik asks whether you want to close the appointment, choose No if there is still a remaining balance.
- Select the next payment method.
- Enter the amount for the second payment.
- Continue until the correct balance is covered.
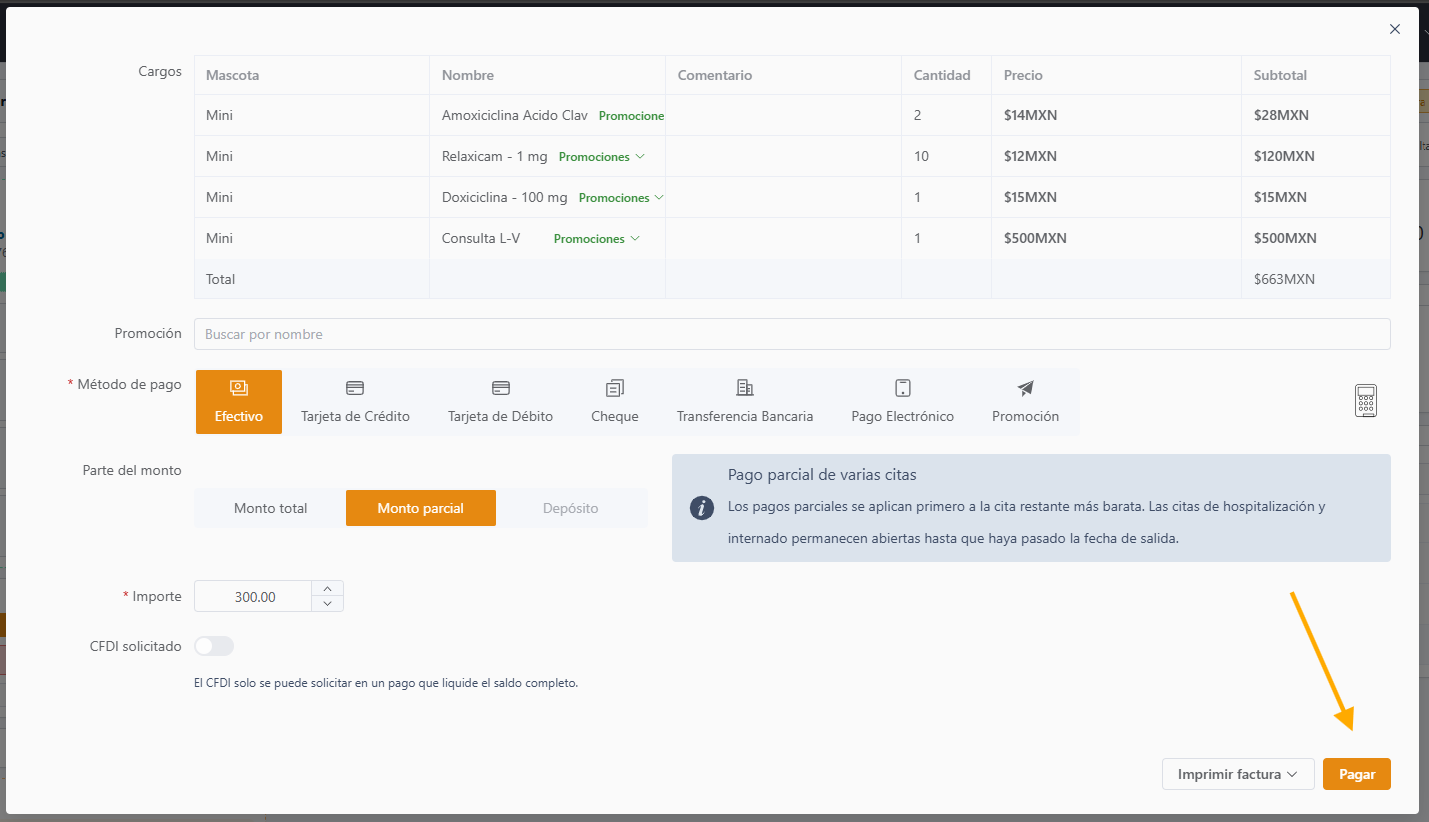
When a remaining balance still needs to be paid, do not close the appointment yet.
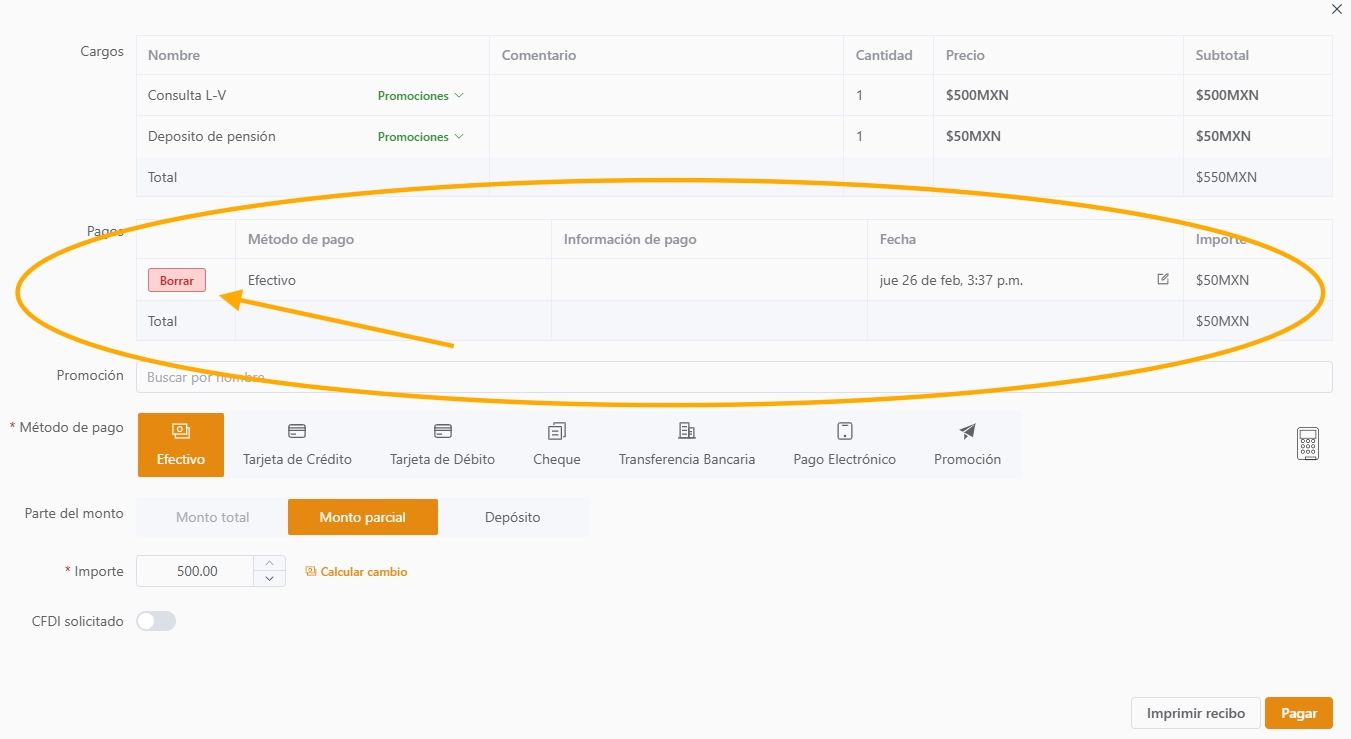
You can see the payments already recorded in the same payment window. If you entered a payment incorrectly, use the related Delete option before continuing.
7. Calculate Change for Cash Payments
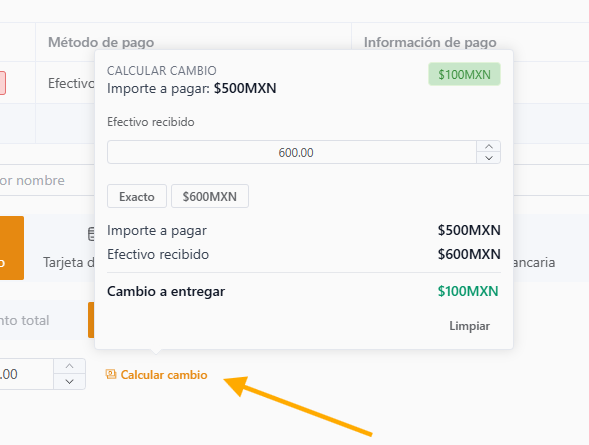
When the client pays with cash, reception can use Calculate change.
- Click Calculate change.
- Enter the amount of cash the client gave you.
- Ubik calculates the change.
- Click outside the field to keep the information.
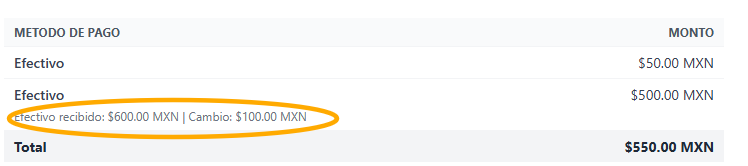
Using the change calculator allows the cash received and change amount to appear on the receipt.
8. Finish a Hospitalization or Boarding Stay Only When It Is Truly Complete
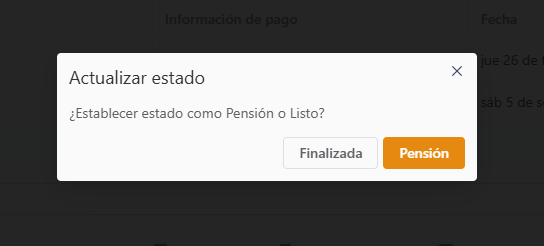
When the payment is for a hospitalization or boarding stay, Ubik may ask whether the stay should be marked as finalized.
- Select Finalized only when the pet's stay has truly ended.
- Do not mark it finalized if the pet will remain at the clinic, for example because the patient will stay hospitalized or boarded for more days.
This lets reception accept a payment without incorrectly indicating that the pet's stay has ended.
9. Complete the Payment
After the correct payment method or methods and amounts are registered, click Pay.
Ubik records the payment and opens the receipt automatically.
10. Deliver or Send the Receipt
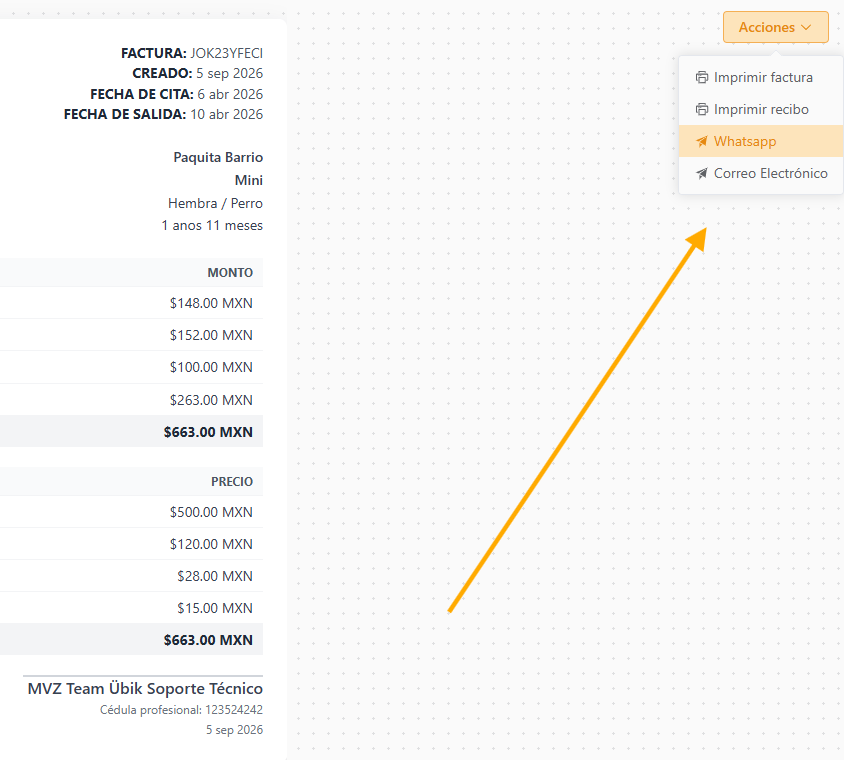
When the receipt opens, reception can give it to the client in several ways:
- Send by WhatsApp.
- Print as a receipt.
- Print in invoice format.
- Send by email, when the client has an email address on file.
Choose the option the client prefers.
Reception Reminder
Before finishing checkout, always verify:
- You are charging the correct appointment or appointments.
- The remaining balance is correct.
- The payment method matches the method the client used.
- The amounts are correct when multiple payment methods are used.
- A hospitalization or boarding stay is marked finalized only when the stay has truly ended.
- The client receives the receipt through the method they prefer.
If you notice an error only after reaching the receipt, contact an administrator. An admin can edit the payment type or amount when a correction is needed.