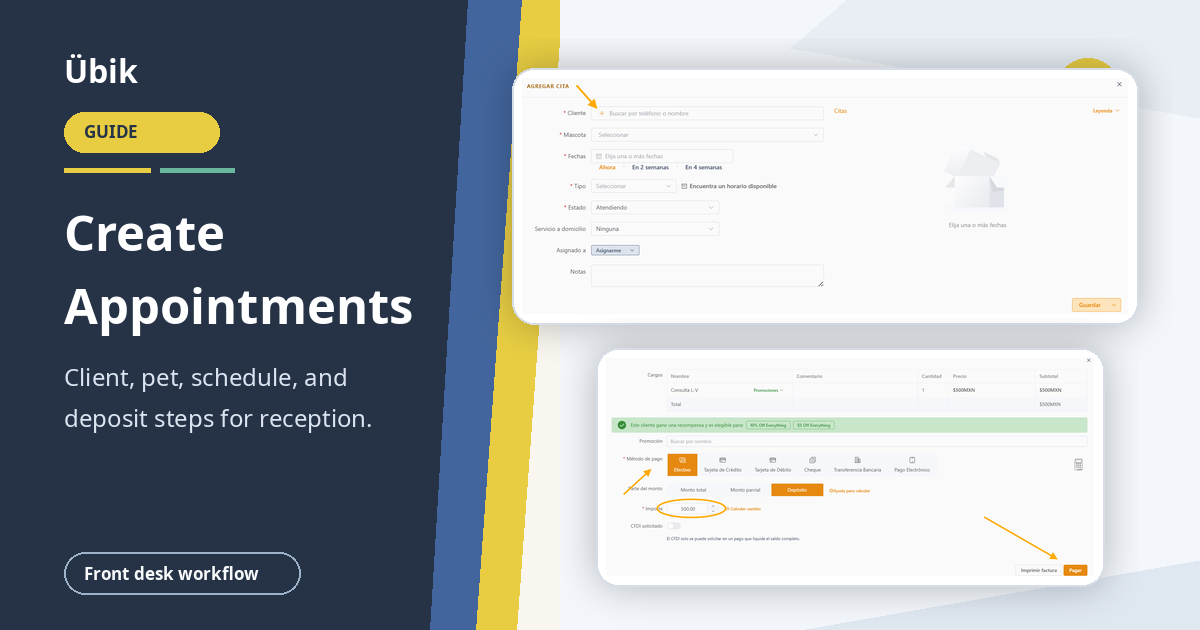
Create an Appointment With a Deposit in Ubik: Reception Step-by-Step
Reception can create a new appointment in Ubik, register the client and pet when needed, schedule one or multiple visits, and collect a deposit before finishing the workflow.
This guide follows the full appointment creation path from Add Appointment through Save and take deposit.
1. Start a New Appointment
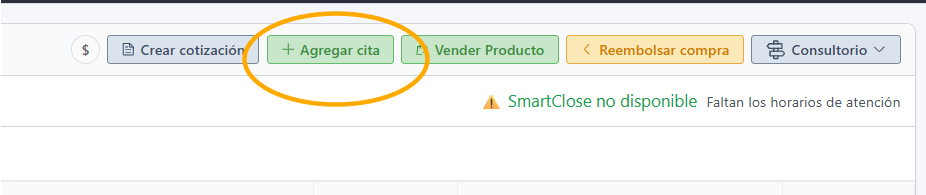
From the Reception Portal, find the green Add Appointment button in the upper-right area.
Click Add Appointment to begin.
2. Select or Create the Client
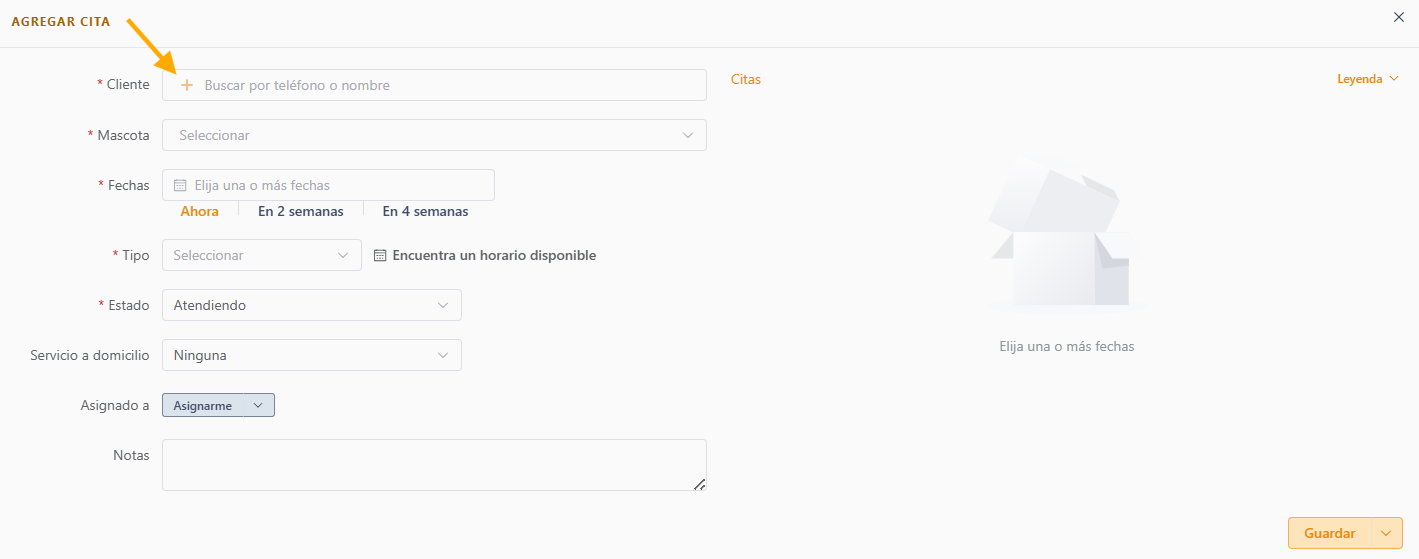
When the appointment window opens, choose the client first.
- If the client is already registered, start typing the client's name in the search bar and select the correct record.
- If this is a new client, click the + button to register the client.
3. Register a New Client
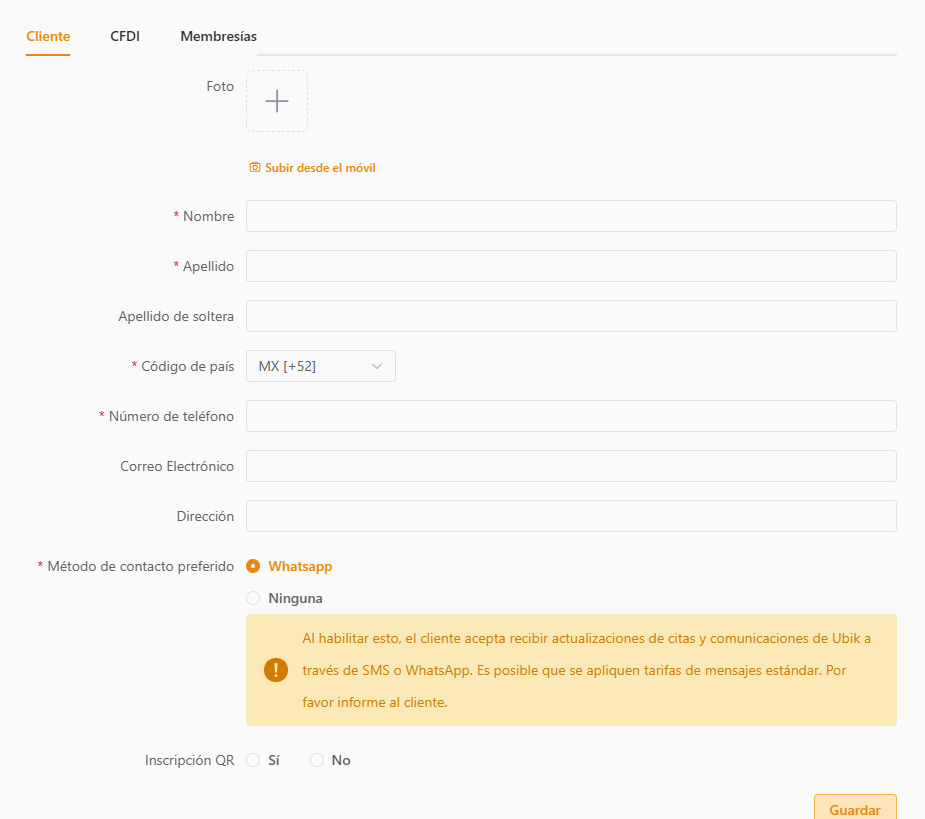
When you click the + button, Ubik opens the client registration form.
Complete every field marked with an asterisk. Required information includes:
- First name.
- Last name.
- Phone number.
Email is optional.
Reception should also ask whether the client accepts being contacted by the clinic and record the preference in the system.
At the bottom of the form, Ubik can also create a QR code enrollment for the client. When this option is used, the client receives a QR code on their phone. They can later use it to check in for an appointment or register for new appointments without giving all of their information again.
4. Add the Pet
After the client is registered, Ubik opens the Add Pet tab.
The required pet fields are:
- Name.
- Sex.
- Taxonomy.
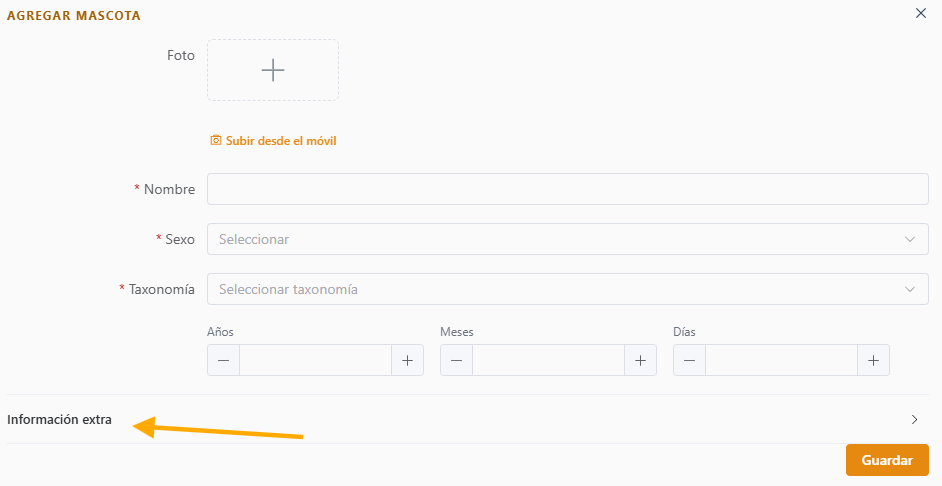
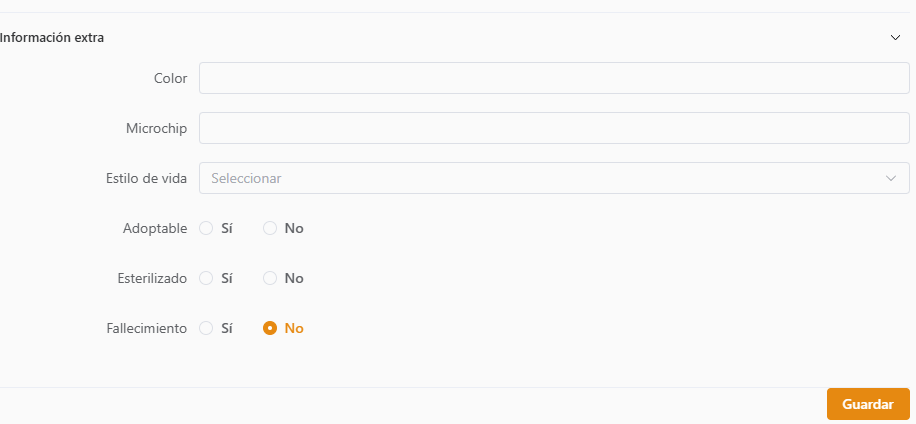
The Additional Information tab is optional. It can be used to record details such as:
- Pet color.
- Microchip.
- Whether the pet is available for adoption.
- Whether the pet is spayed or neutered.
- Whether the pet is deceased.
You do not need to complete this section to continue creating the appointment.
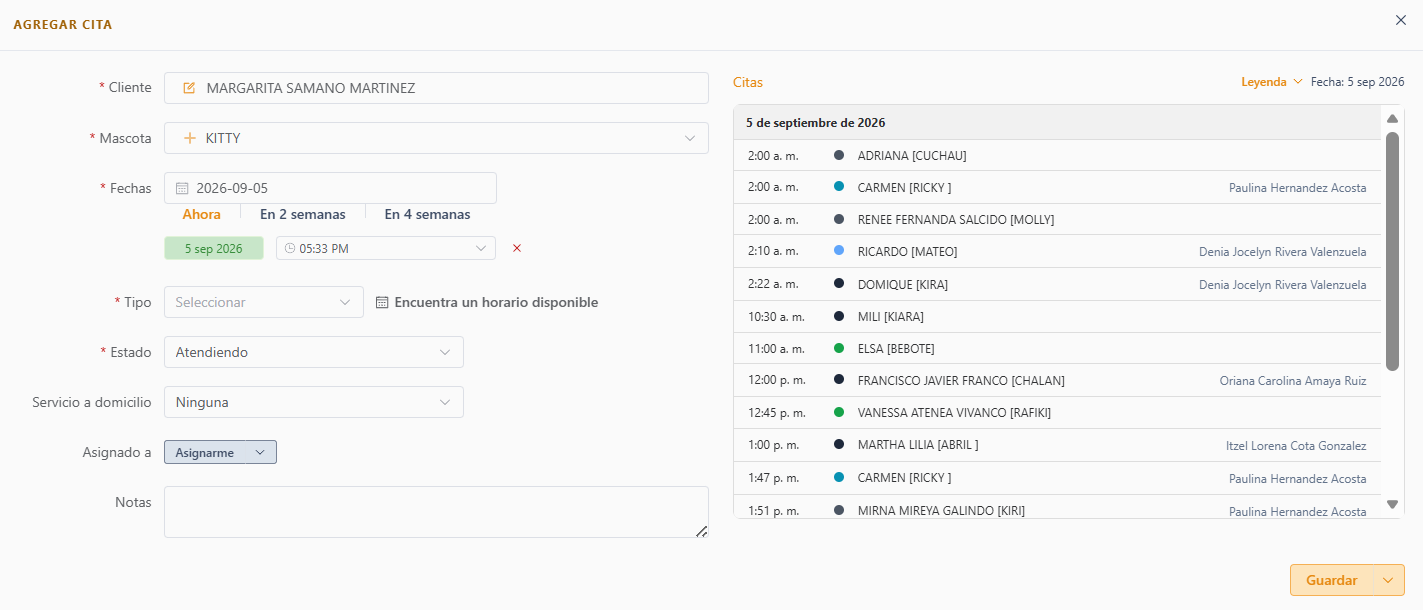
5. Choose the Appointment Date and Time
After adding the client and pet, select the appointment date and time.
If the patient is already at the clinic and will be seen now, click Now. Ubik creates the appointment for the current moment.

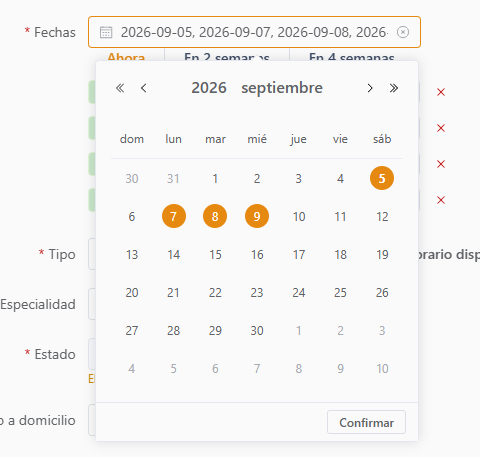
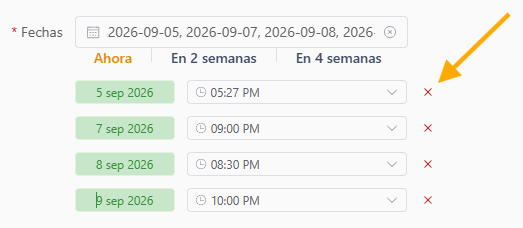
Create Several Appointments at the Same Time
Ubik can schedule multiple appointments for the same patient from this same window.
- Select the date and time for the first appointment.
- Click the calendar icon.
- Select the other days when you want to create appointments.
- Close the calendar by clicking outside the calendar window.
- Select the time for each appointment you added.
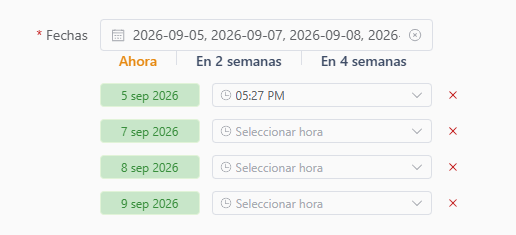
If you added an appointment by mistake, click the red X next to that date to remove it.
6. Select the Appointment Type
Choose the appointment type that matches the service the patient will receive.
Examples include:
- Consultation.
- Vaccination.
- Surgery.
- Other appointment types configured by the clinic.
You can also select a specialty if it applies. Specialty is not required, so it can be left blank.
7. Select the Appointment Status
Choose the status that fits the appointment.
The statuses reception uses most often are:
- Waiting room: the patient has arrived and is waiting to be seen.
- In progress: the patient is already being attended.
- Future appointment: the appointment is scheduled for a later date or time.
8. Mark a Home Service When Needed
If the veterinarian will see the patient at the client's home, turn on the home-service option for the appointment.
9. Assign a Veterinarian
If you already know which veterinarian will attend the patient, assign that veterinarian directly on the appointment.
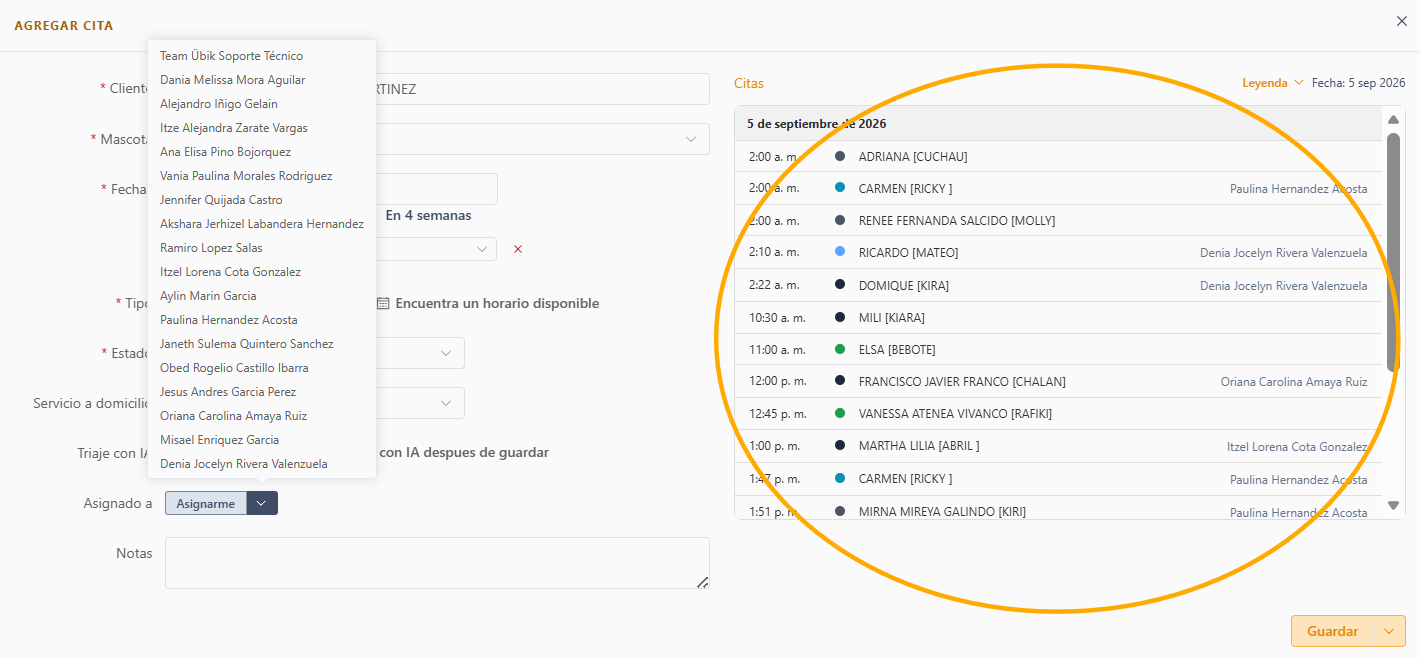
The right side of the appointment window shows scheduling context, including:
- Available times.
- Times that are already occupied.
- The veterinarian assigned to existing appointments.
After you select a veterinarian, you can also review that veterinarian's available times.
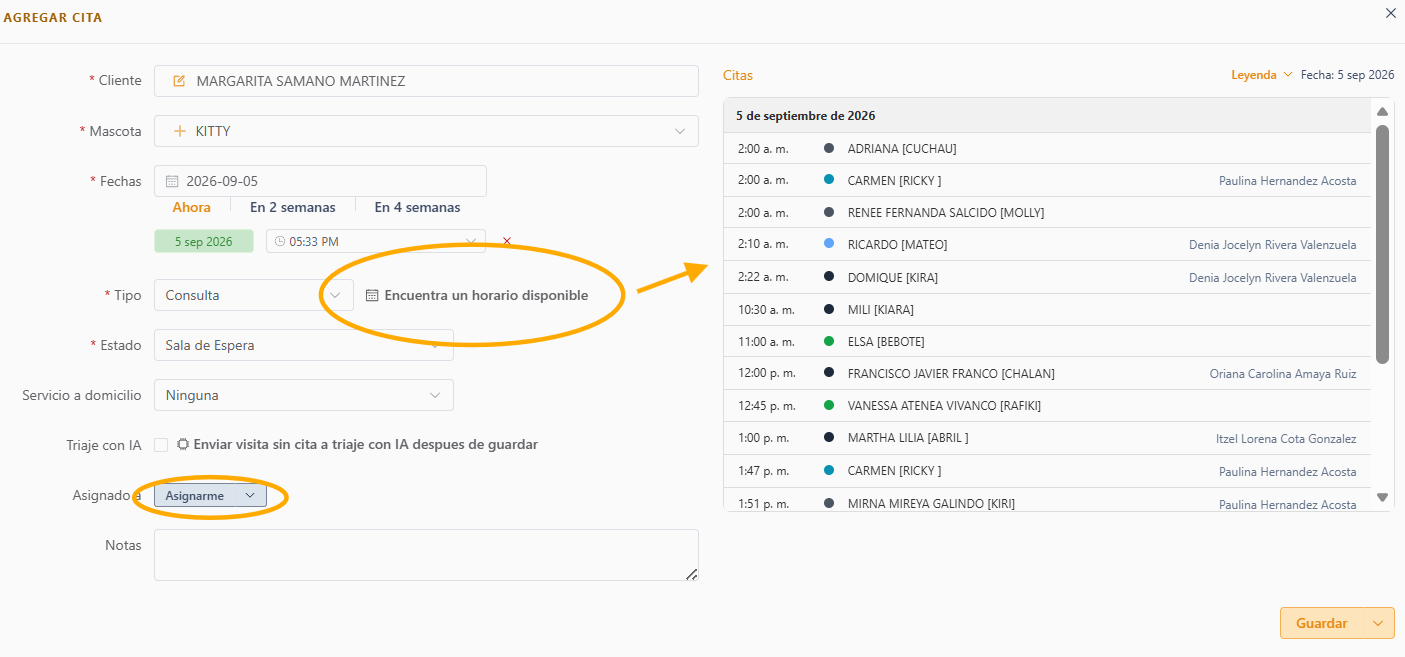
Find an Available Time
If the clinic has configured veterinarian work schedules and appointment types each veterinarian can handle, use Find an available time.
Click the button next to the appointment type and Ubik will show times with availability for that type of appointment.
10. Save the Appointment
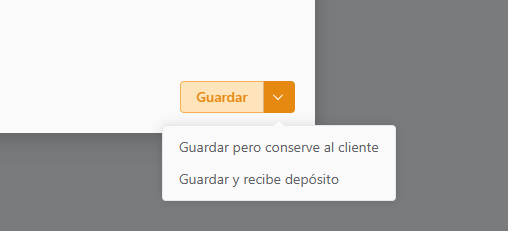
When the appointment is ready, you have three save options:
- Save: creates the appointment and finishes the process.
- Save and keep client: creates the appointment while keeping the same client selected. Use this when you need to create another appointment for another pet from the same client.
- Save and take deposit: creates the appointment and immediately opens the payment window so reception can record an advance payment or deposit.
11. Register the Deposit
If you select Save and take deposit, Ubik opens the payment window.
Enter:
- The payment method.
- The amount the client will leave as a deposit.
Verify both details and click Pay.
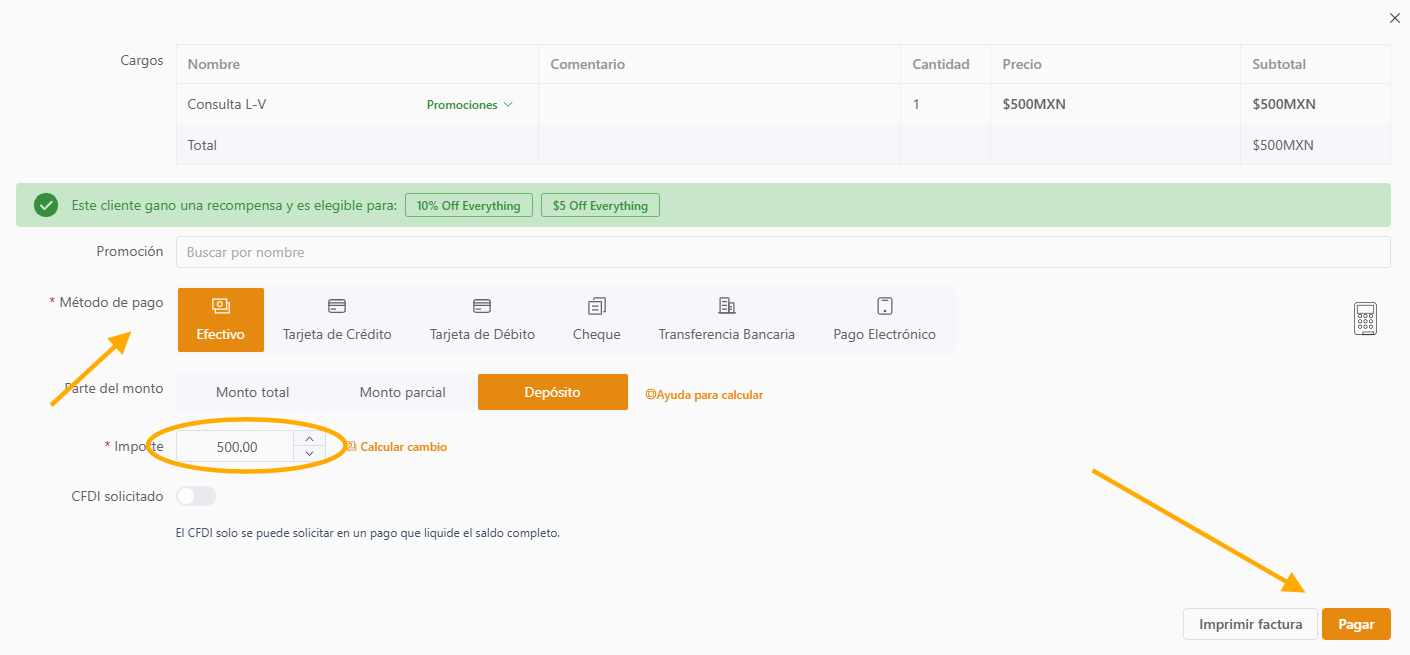
The deposit is saved on the appointment. Ubik then opens the receipt automatically, even when the payment is only a deposit and not the full appointment payment.
Reception Checklist
Before finishing, confirm:
- The correct client is selected or registered.
- The correct pet is selected or registered.
- The appointment date and time are correct.
- Extra appointment dates were removed if they were added by mistake.
- The appointment type and status match the visit.
- Home service is marked only when the veterinarian will go to the client's location.
- The correct veterinarian is assigned when the clinic already knows who will attend.
- The deposit amount and payment method are correct before clicking Pay.