How to Manage Hospitalizations in Ubik
Hospitalizations need a clear plan, accurate documentation, and a clean discharge process. Ubik connects those steps so the clinical team can plan inpatient care, record what was administered, and help reception prepare the bill when the pet is ready to go home.
This guide walks through the hospitalization workflow from two sides:
- Technician side: create or open the hospitalization, build the stay plan, record care, and move the patient to pending discharge.
- Reception side: find the pending discharge appointment, add any final items, and continue to payment.
Technician Workflow
1. Create the Hospitalization Appointment
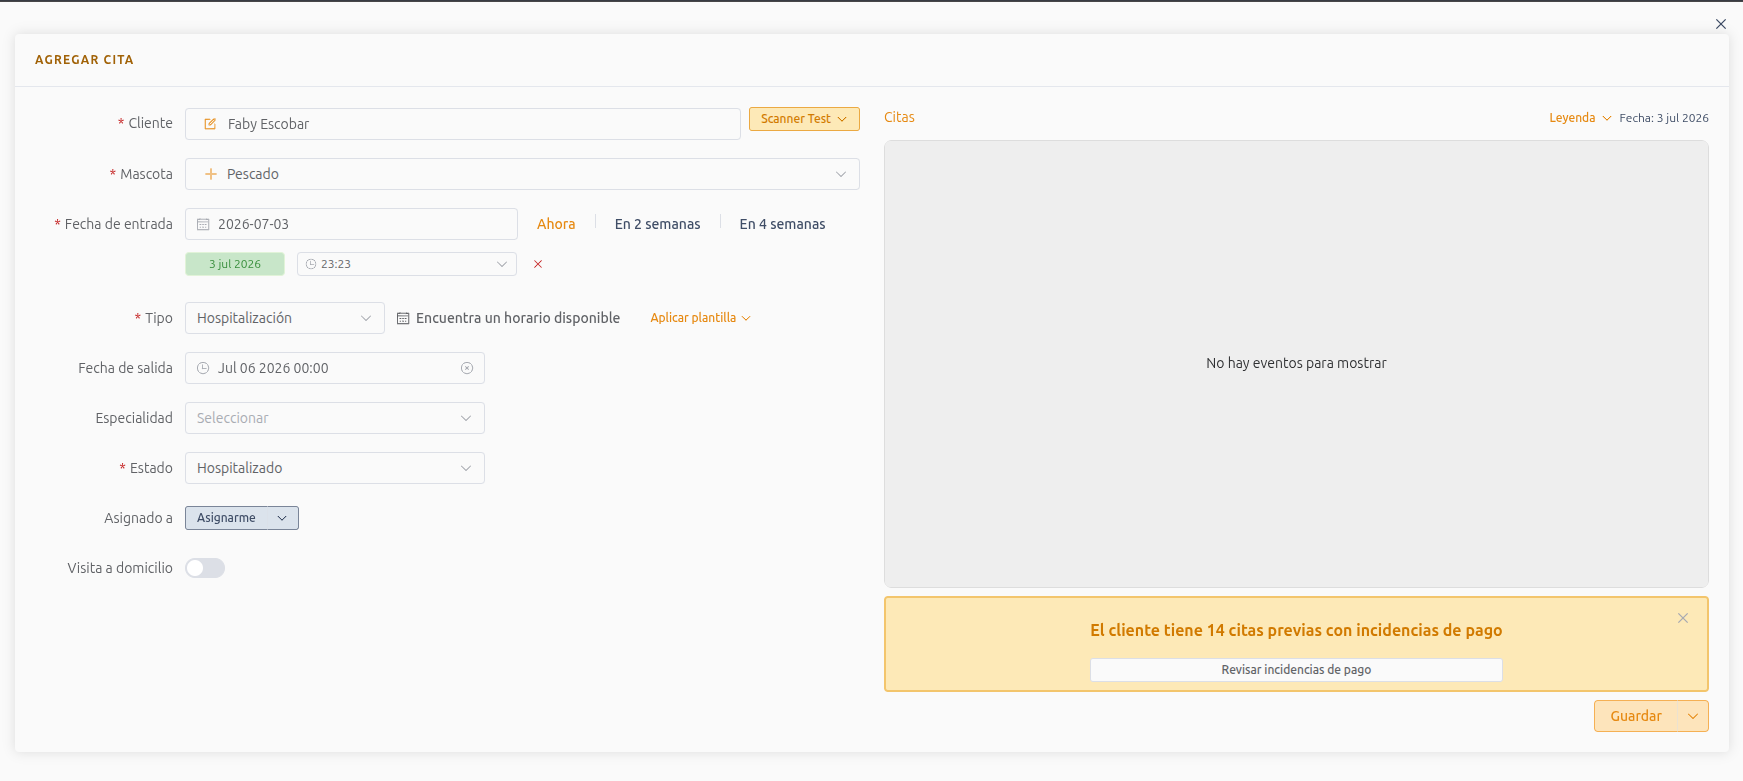
Create the appointment as you normally would, but set the appointment type to Hospitalization. A hospitalization should always include a checkout date and time.
If the exact checkout date is not known yet, enter the best estimate and update it later as the patient's condition changes. This date helps the clinic plan care, reminders, discharge timing, and billing.
After the hospitalization is created, use the appointment Print menu to print cage labels when needed. Open Print > Labels > Print Crate Labels from the technician or reception portal to create labels for the patient's cage, kennel, or hospitalization area.
2. Build the Stay Instructions
After the appointment is created, open the hospitalization in the technician portal and use Stay Instructions to build the plan for the patient's stay.
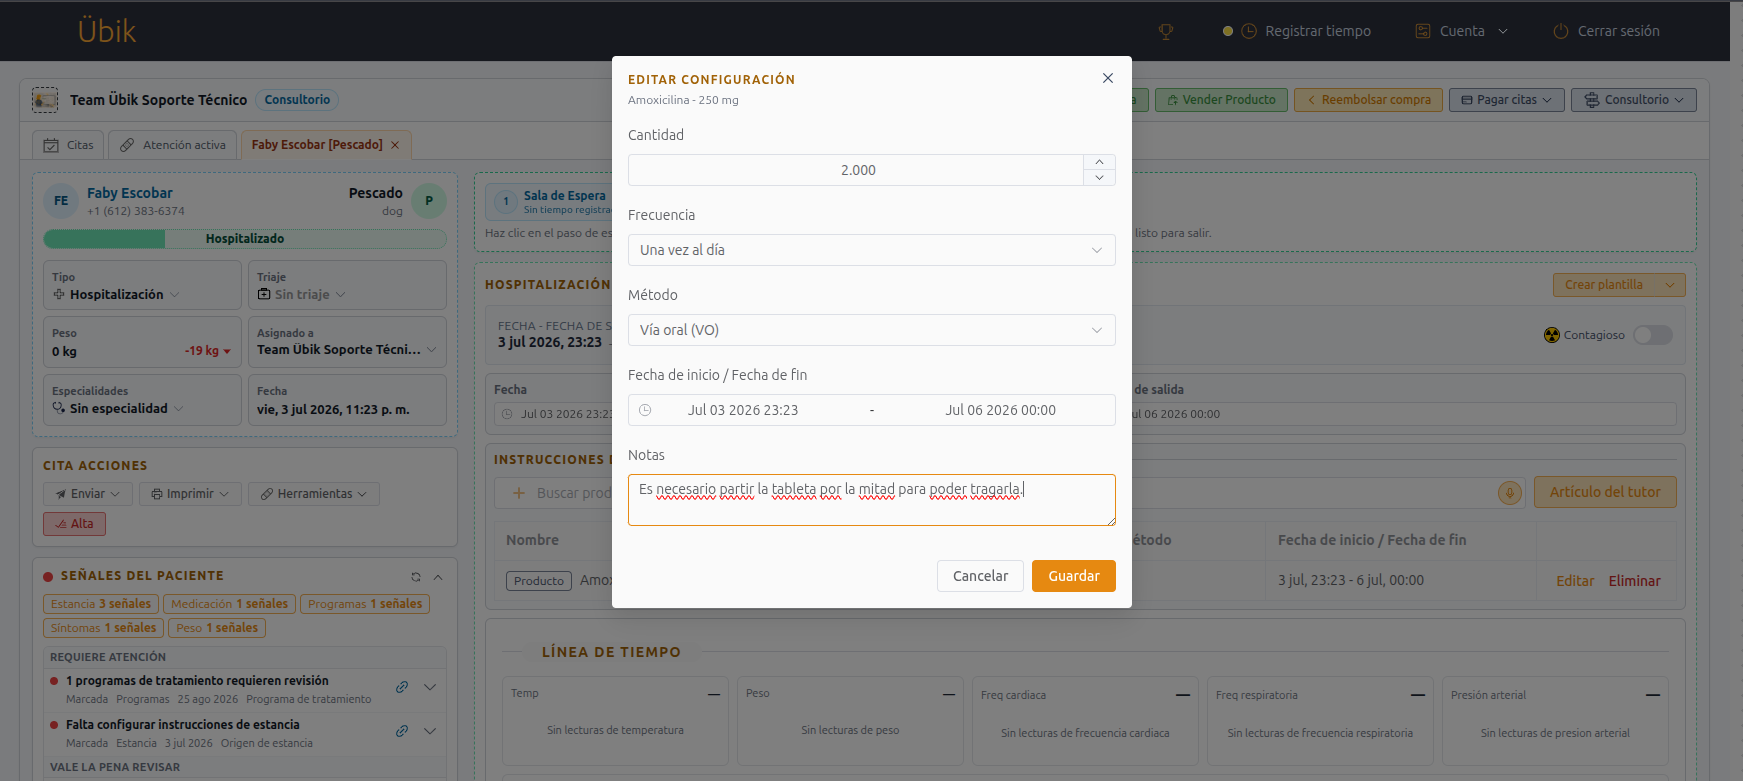
Hospitalization instructions can include inventory and services that will be used repeatedly during the stay. For each instruction, edit the configuration and set:
- Quantity used each time
- Frequency
- Method
- Start and end dates
- Optional notes for the care team
When you add a product or service that creates a stay instruction, Ubik opens the instruction editor automatically so you can finish the configuration immediately. If the item has linked products or services to choose from first, finish the selector and then the instruction editor opens.
For example, if the patient should receive two tablets once per day, the quantity is 2 because that is the amount used each time the instruction is administered.
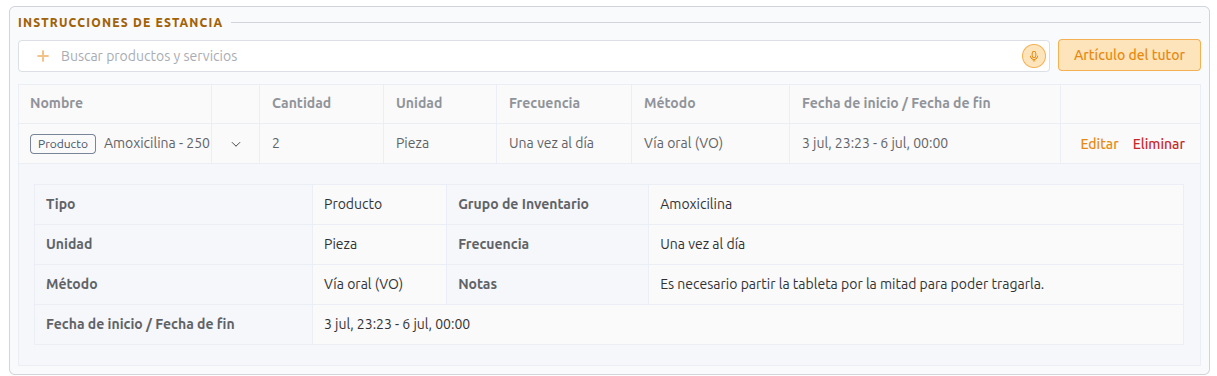
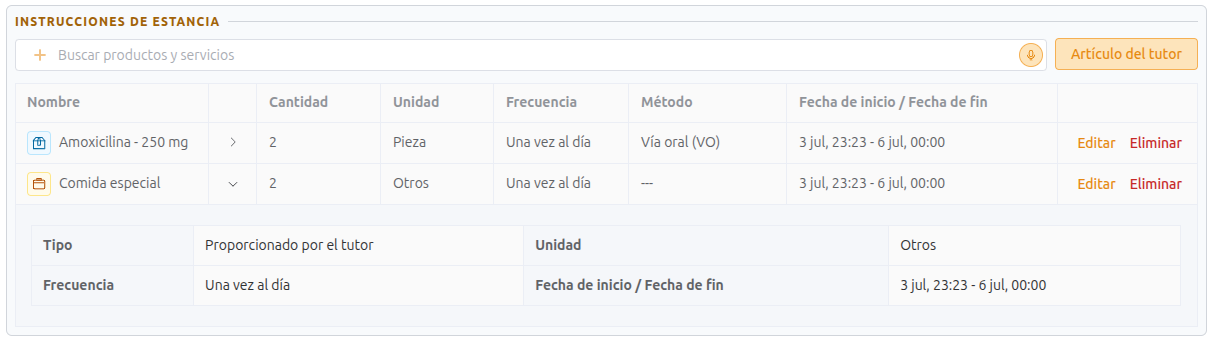
The saved instruction remains visible in the stay plan so the team can review the quantity, frequency, method, dates, and notes before care begins.
2.5. Add Owner-Supplied Instructions When Needed
If the owner brings food, medicine, or another item from home, add it as an owner-supplied hospitalization instruction. These items are part of the care plan, but they are not sold from clinic inventory.
Use this for items such as:
- Food brought from home
- Medication supplied by the owner
- Special care materials that should be tracked but not billed as clinic inventory
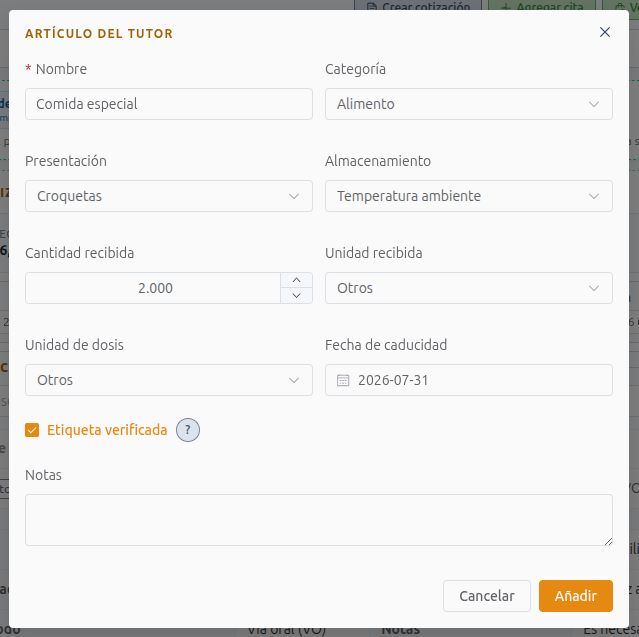
Owner-supplied items appear in the stay instructions list so the team can administer or track them alongside the clinic-provided instructions.
3. Subscribe to Hospitalization Notifications
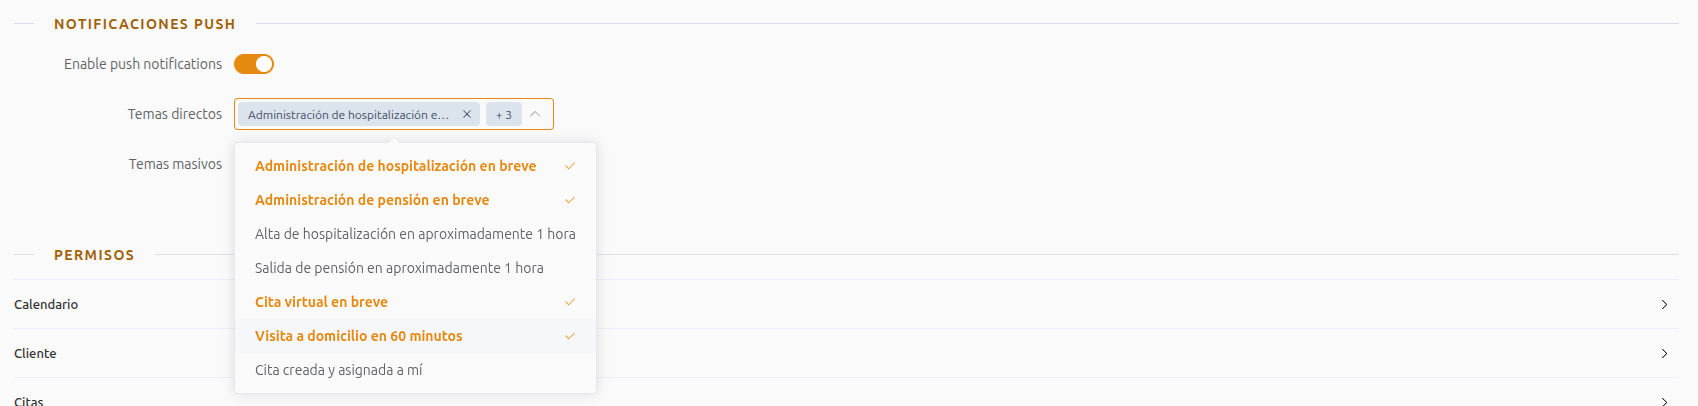
Doctors can subscribe to hospitalization notifications from their user settings. Open Account > My Profile in the top menu, then find the Push notifications section inside User configuration.
The most important direct notifications for assigned patients are:
- Hospitalization Administer Soon
- Hospitalization Check Out in About an Hour
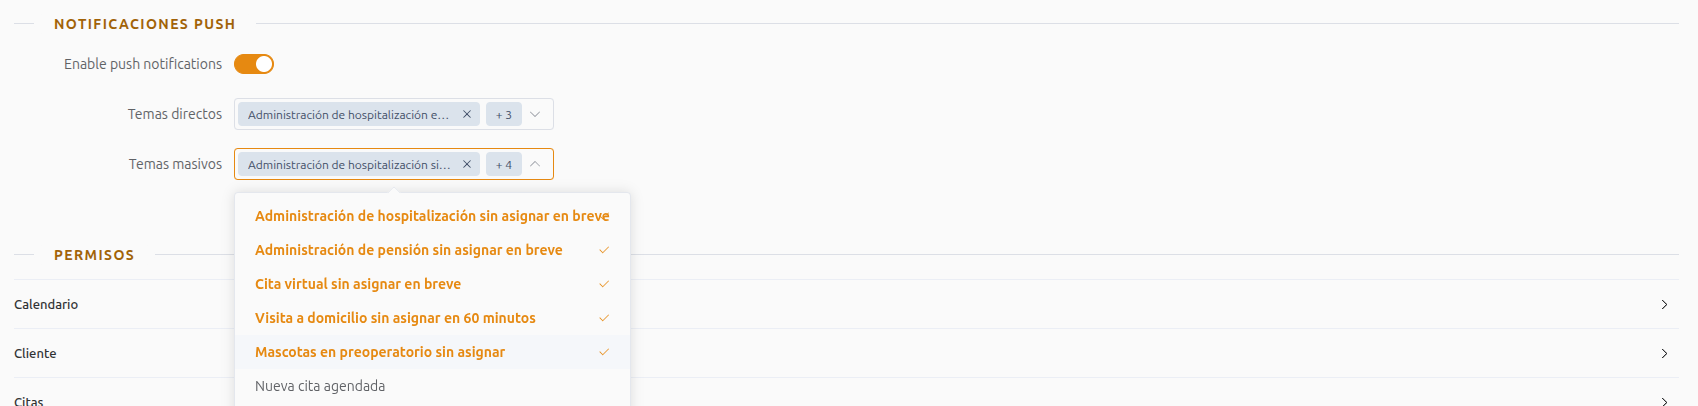
Clinics can also subscribe users to unassigned hospitalization notifications. This helps the team catch due administrations even when a hospitalization is not assigned to a specific doctor.
The related notification is:
- Unassigned Hospitalization Administer Due Soon
4. Record Each Administration
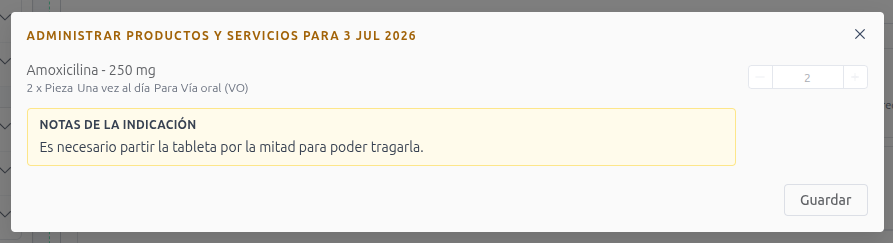
When it is time to administer a scheduled item, open the hospitalization from Active Care, find the next needed administration, and click the administration tag or pill when the task is completed.
Ubik shows the scheduled item, the quantity, the method, and any instruction notes. Save the administration after confirming the task was completed.
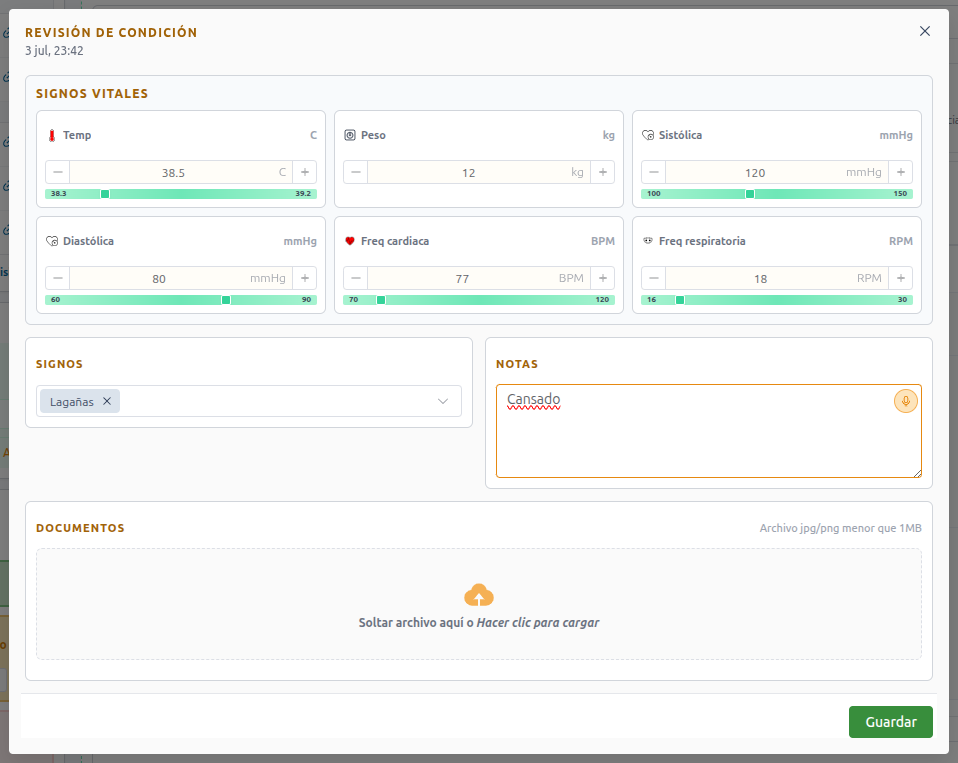
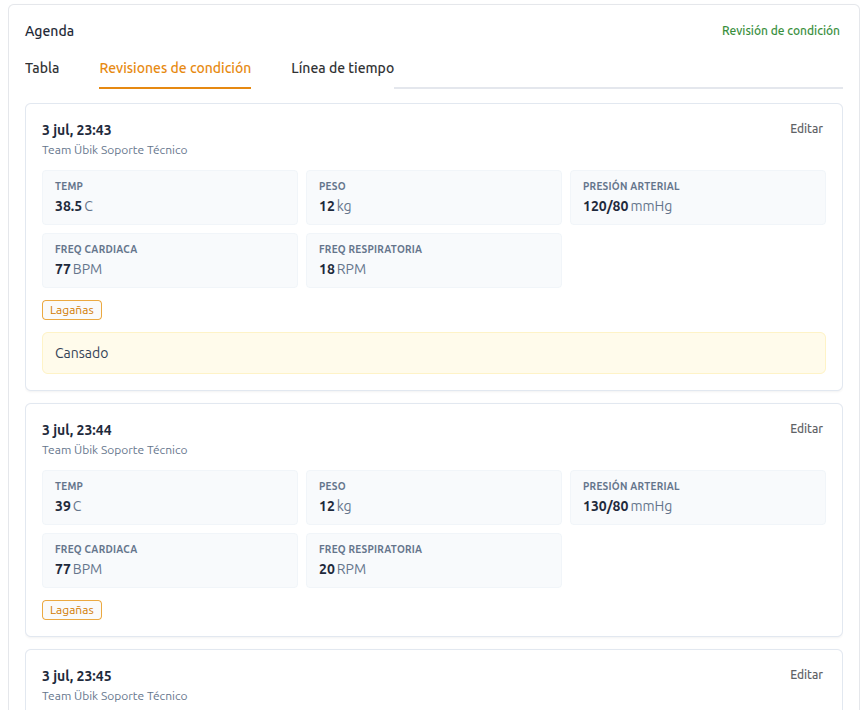
We strongly recommend recording a condition check during the stay, especially after administrations or when the patient's condition changes. A good condition check can include:
- Vitals
- Current symptoms
- Clinical notes
- Documents or photos
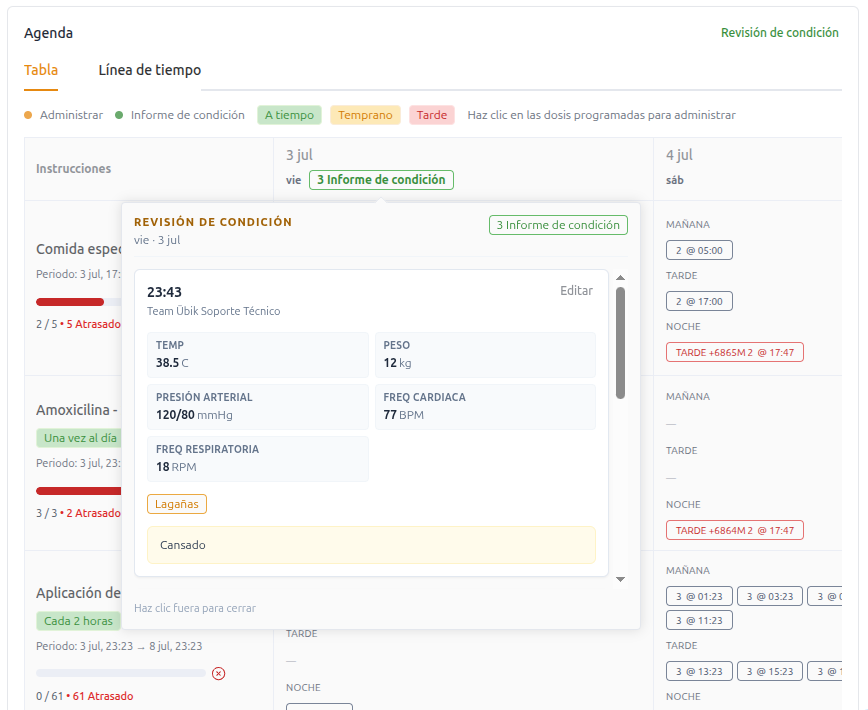
After condition checks are saved, the table view shows a condition report tag in each day header when that day has reports. Hover over the tag for the day you want to examine to preview the saved vitals, symptoms, notes, documents, and author. The preview stays open until you click outside it.
To read every condition check in chronological order, use View all condition checks from the preview or open the Condition Checks tab.
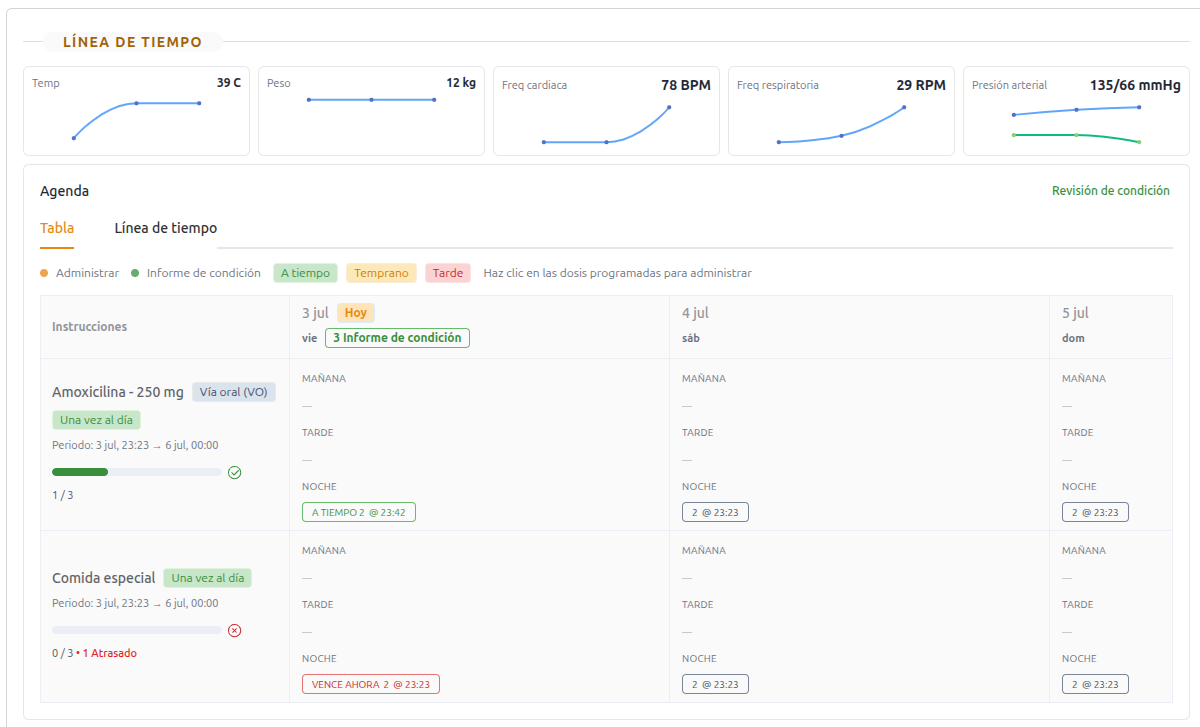
The course summary shows the full schedule, including completed, upcoming, late, and on-time administrations. This gives the team a fast way to understand what has happened and what still needs to happen.
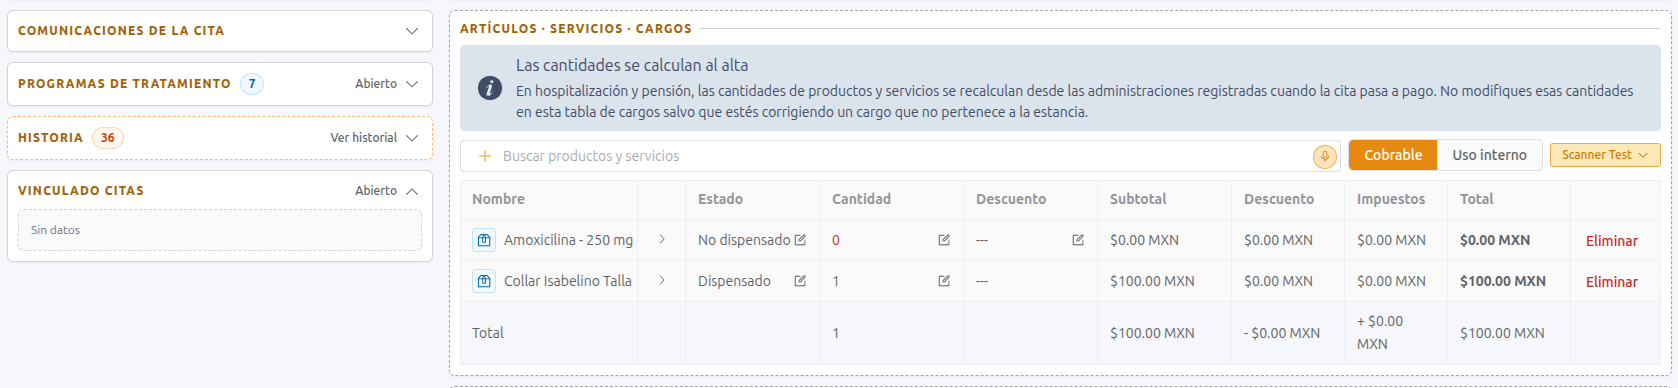
5. Add One-Time Items, Services, and Charges
Use Items, Services, and Charges for things that are not part of the repeated hospitalization instruction plan. Examples include:
- Elizabethan collar
- Hospitalization service fee
- One-time lab fee
- Supplies or services used once during the stay
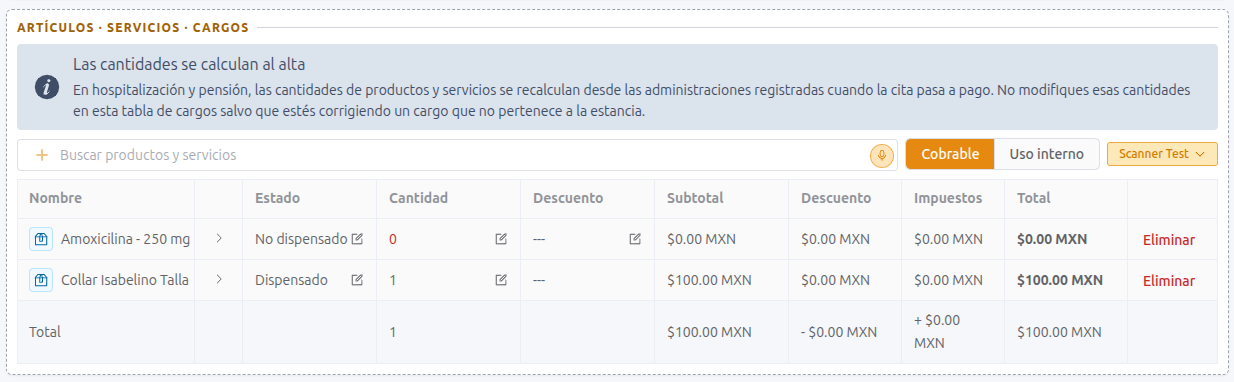
Hospitalization instruction items may also appear in this table as not dispensed with quantity 0. Do not edit those rows during the stay. Ubik recalculates the final quantities from the recorded administrations during discharge.
Use this section only for one-time charges that are not part of the scheduled hospitalization instructions.
6. Use Templates for Common Hospitalization Plans
If your clinic often uses the same hospitalization setup, save it as a template. Templates are useful for common scenarios where the same instructions, notes, services, or owner-supplied items are used repeatedly.
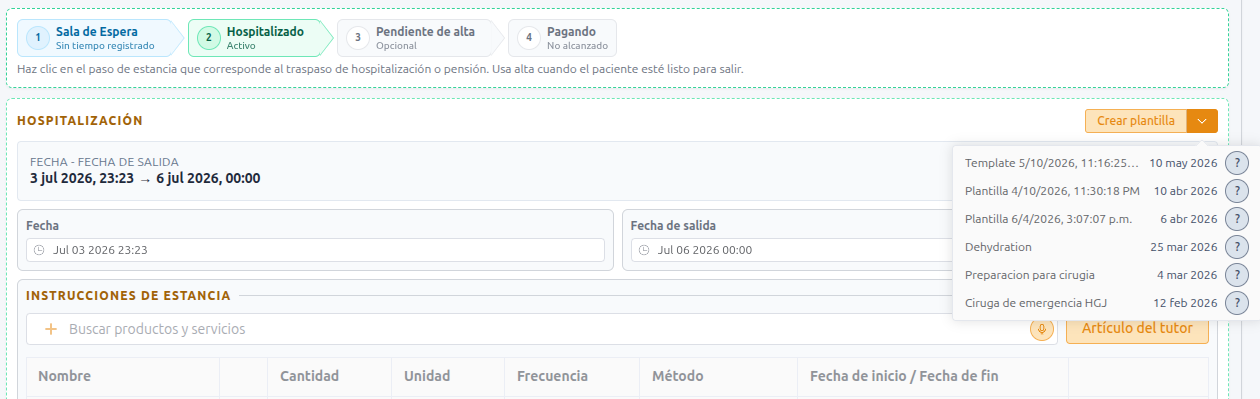
When creating a template, choose which parts of the current configuration should be saved. Later, the team can apply the template and Ubik will rebuild the configuration automatically.
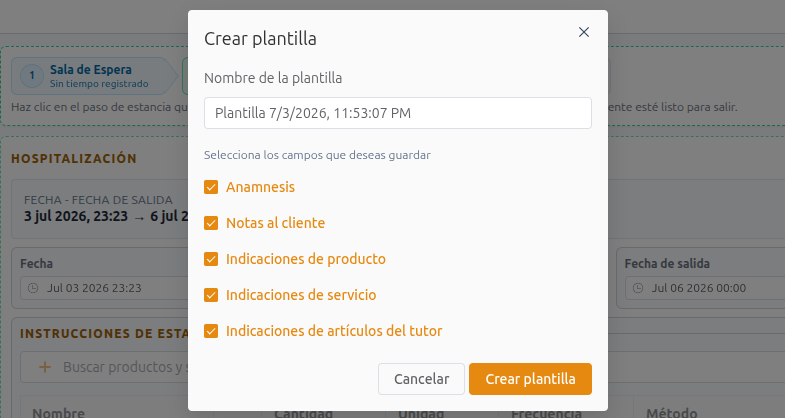
Templates save time and help standardize care plans across the team.
7. Link Related Appointments During the Stay
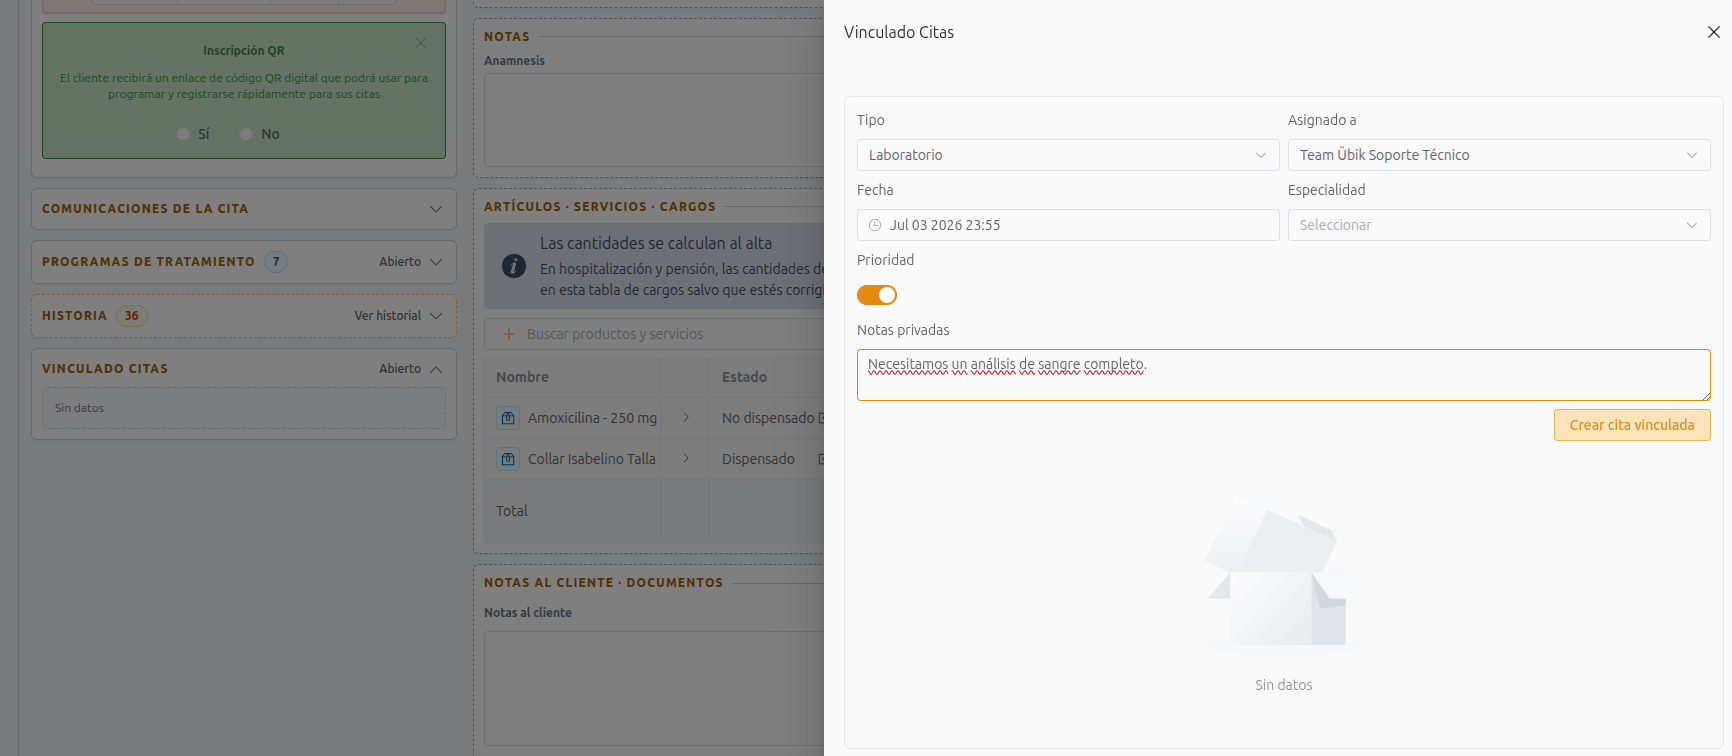
During a hospitalization, you may need to create related appointments. For example, a doctor may order an in-house lab panel that a lab technician will complete.
Use linked appointments to keep that work connected to the hospitalization.
When creating a linked appointment, select the type, assignee, date, priority, and private notes for the team.
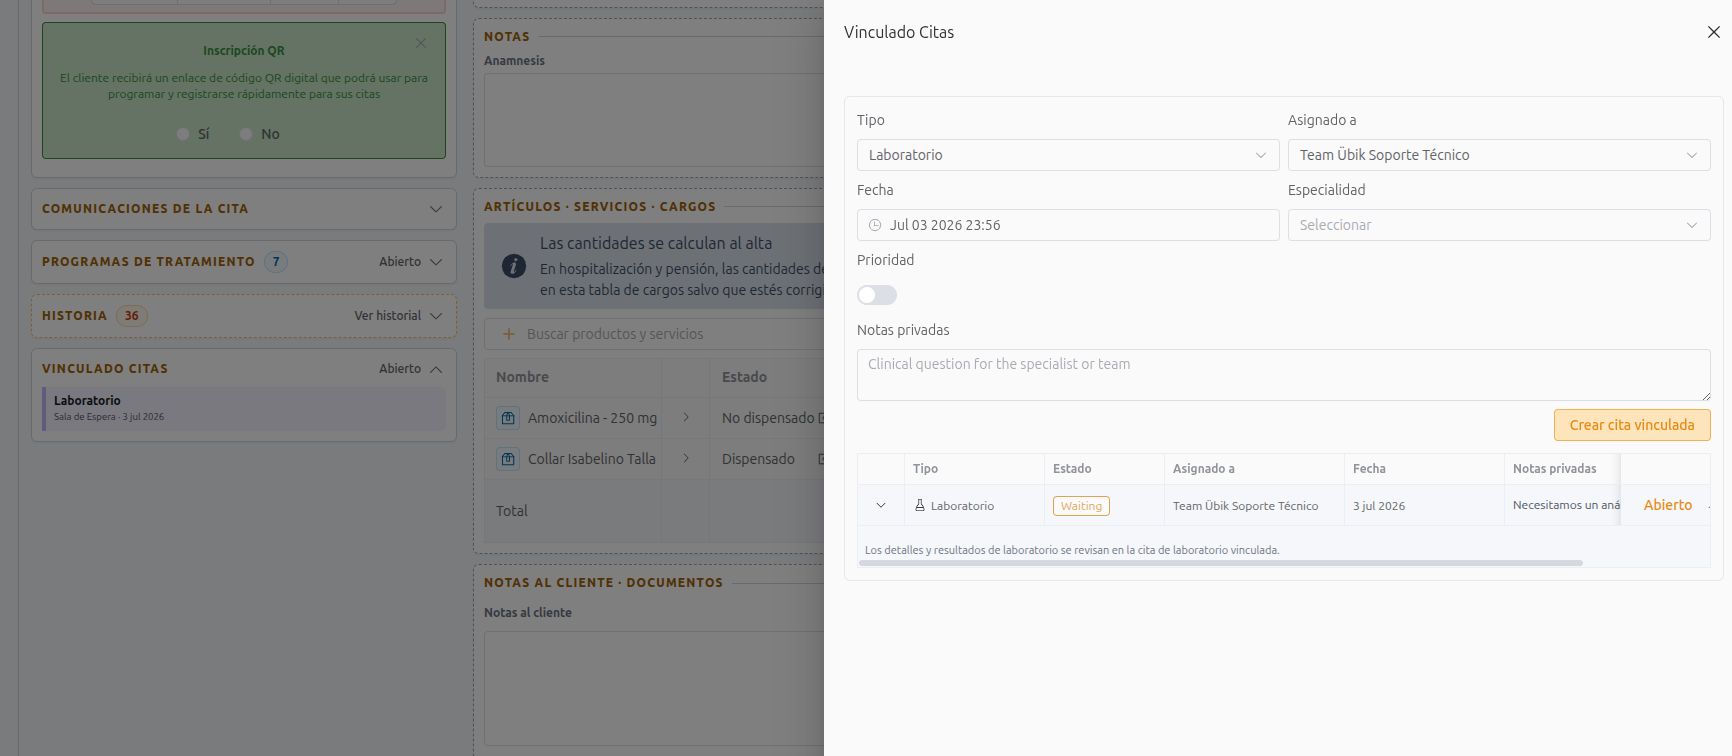
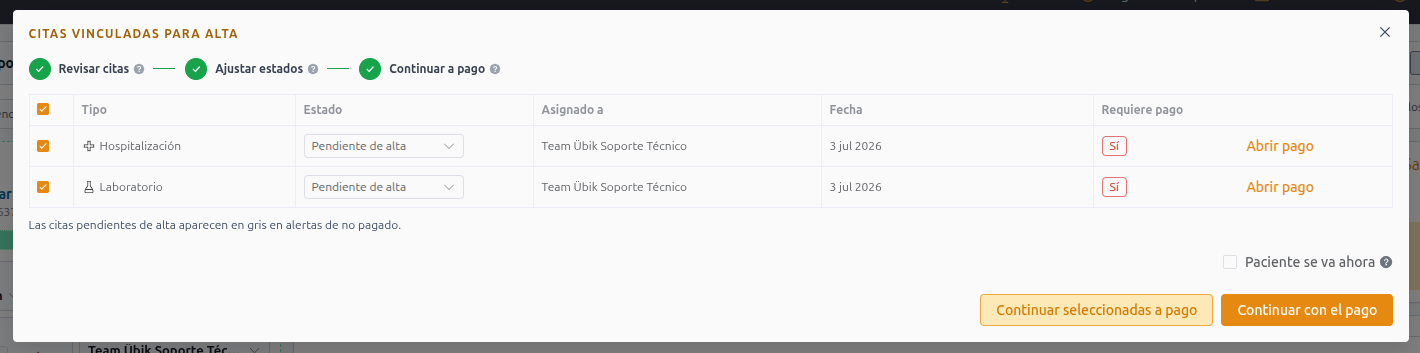
After the linked appointment is created, it remains connected to the hospitalization. This helps reception include related work during the discharge and payment process.
8. Move the Patient to Pending Discharge
When the pet is ready to go home, click Discharge or Alta from the hospitalization appointment.
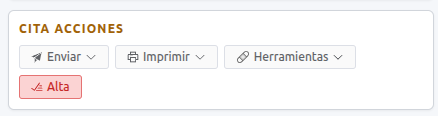
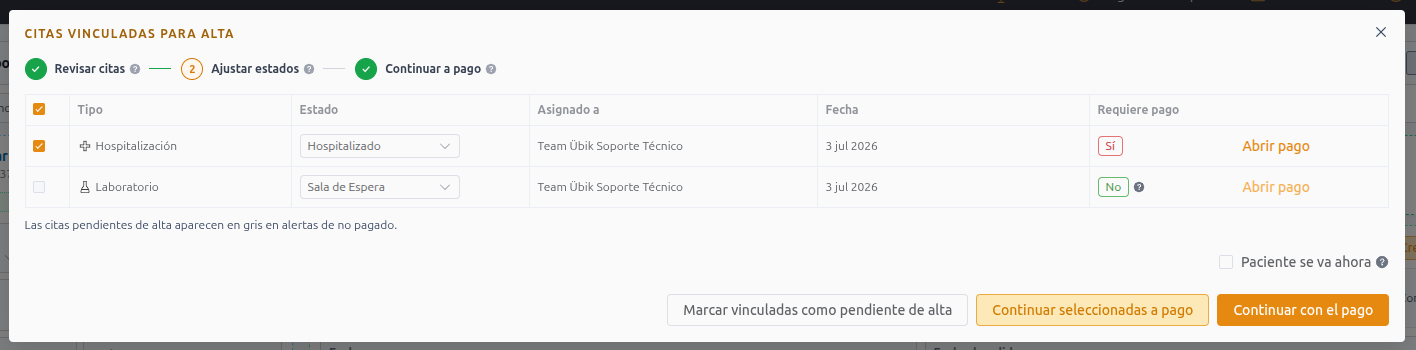
Ubik reviews linked appointments and lets the team decide which related appointments should move forward with discharge or payment.
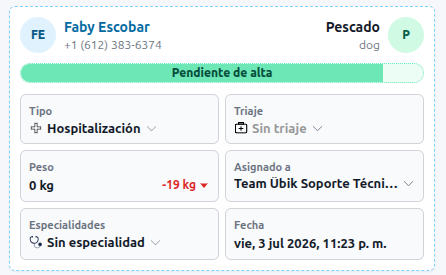
After discharge is started, the hospitalization moves to Pending Discharge. The pet can stay in this status until the owner arrives.
Reception Workflow
1. Create the Hospitalization if Reception Starts It
If reception is creating the hospitalization appointment, use the same process: create the appointment normally, choose the Hospitalization type, and enter a checkout date and time.
If the checkout time is uncertain, enter the best estimate and update it later.
2. Find the Pending Discharge Appointment
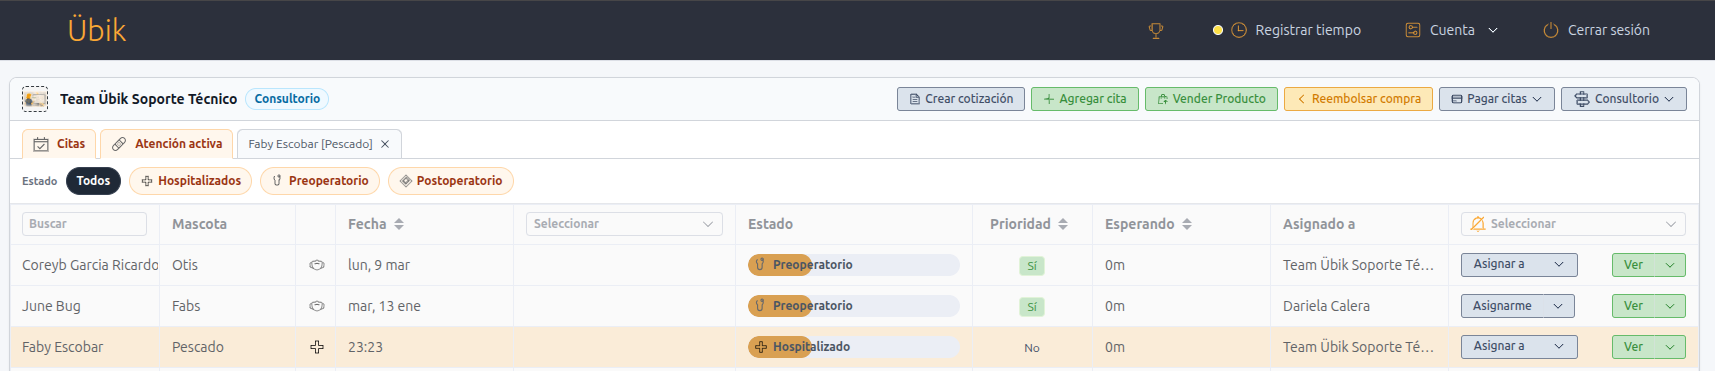
When the owner arrives, open the regular Appointments tab and use the Pending Discharge filter. Pending discharge hospitalizations appear with the regular appointments, not only in Active Care.

Open the appointment from this list to continue the discharge and payment process.
3. Add Final Items Before Payment
Before taking payment, add any final chart items that were not part of the hospitalization instructions.
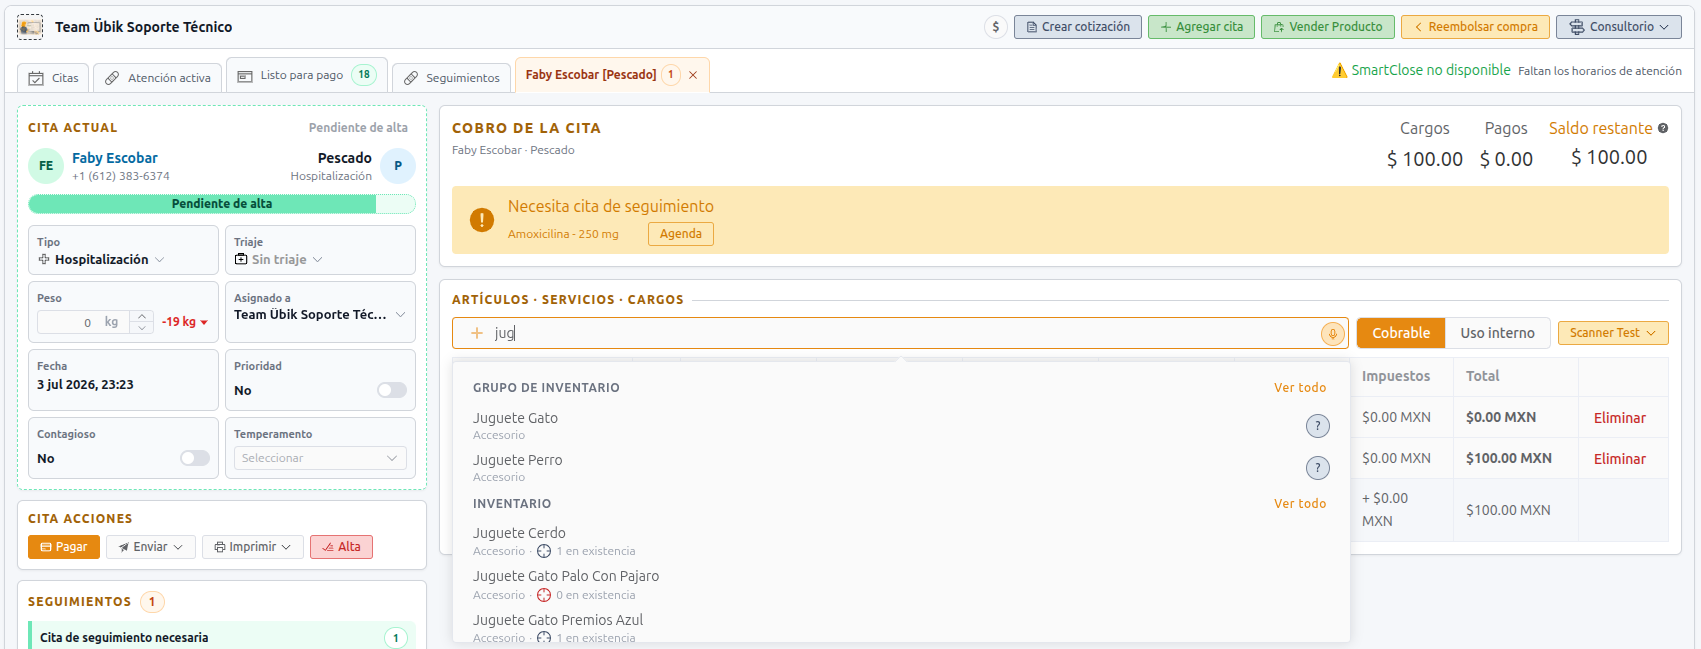
For example, reception can add a product or service that was needed at the end of the stay.
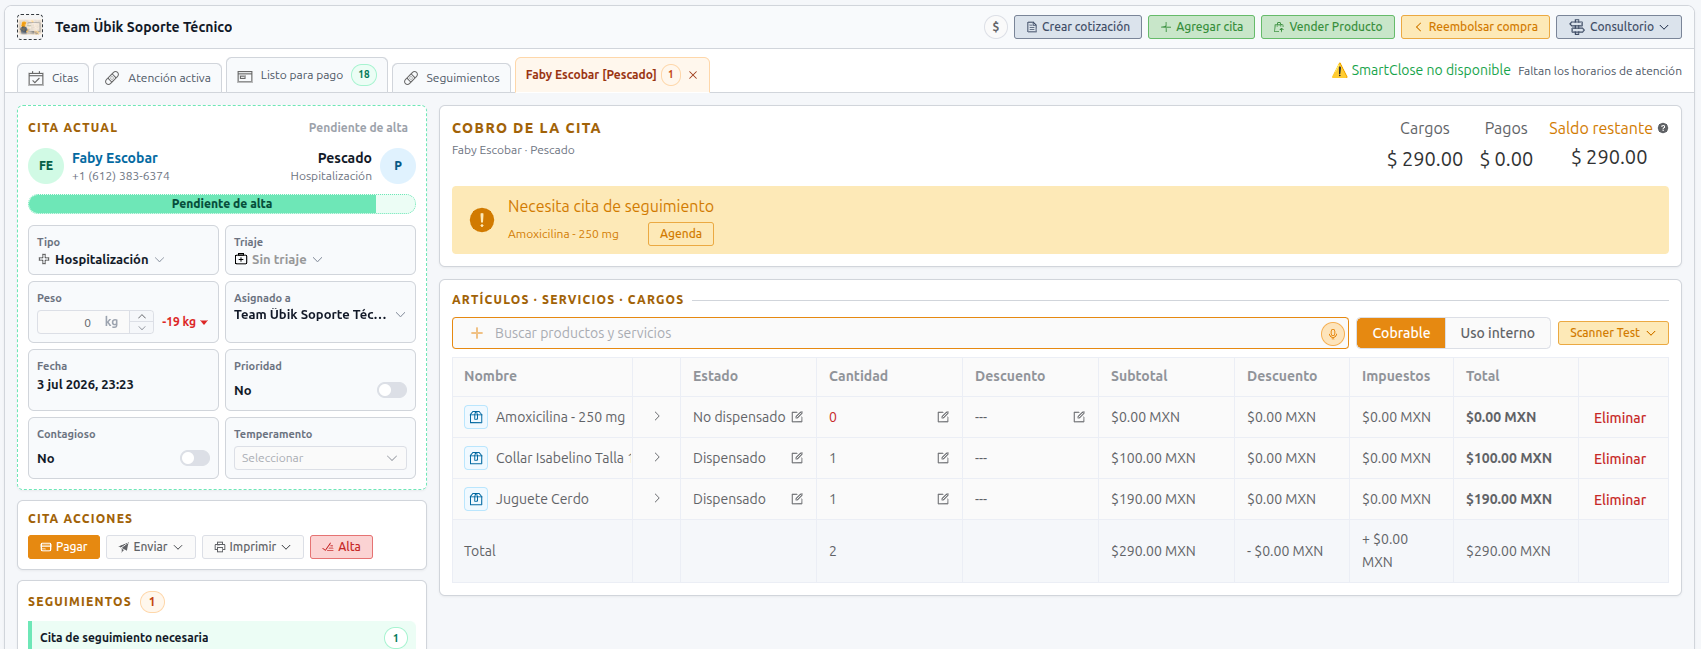
Do not change scheduled hospitalization instruction rows in the charge table. Those quantities are calculated from the recorded administrations.
4. Continue Discharge and Build the Payment
Use the payment or discharge action to continue the billing process.

Ubik reviews linked appointments and prepares the charges that should continue to payment.
The payment screen shows the charges, quantities, prices, and total before the clinic collects payment.
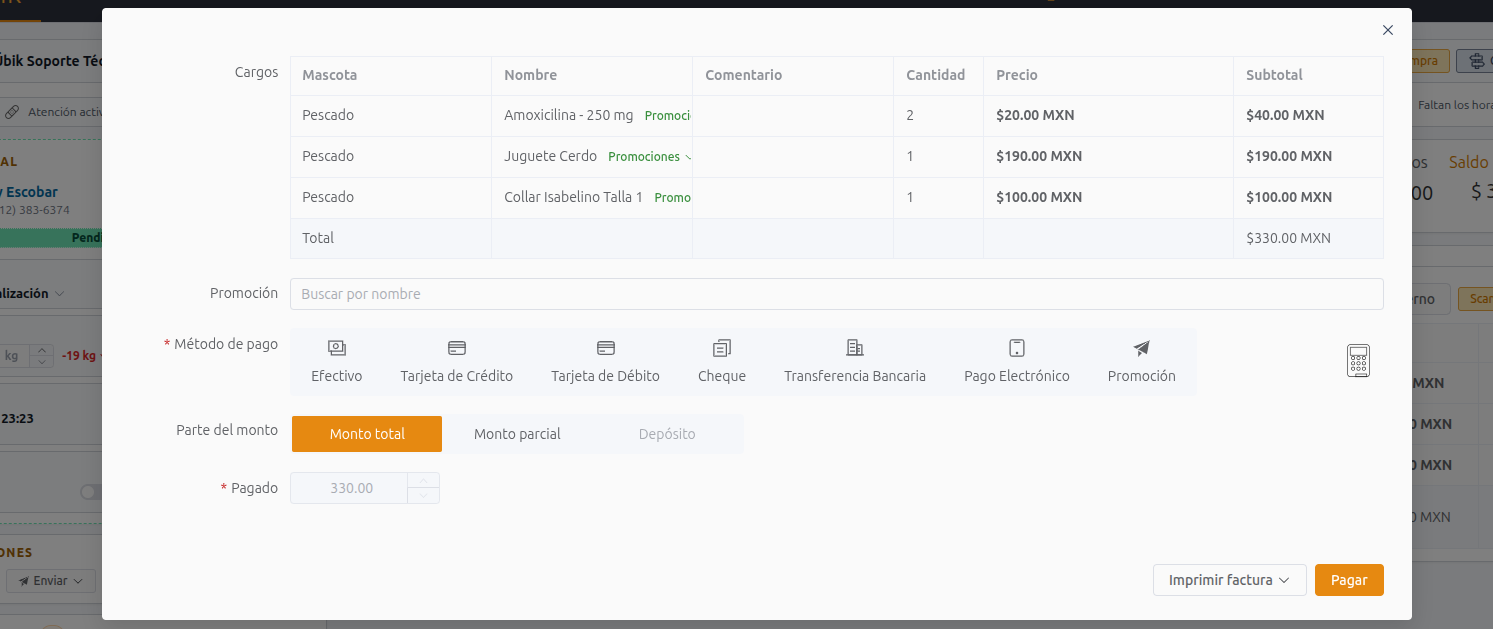
If the current date is before the hospitalization checkout date, Ubik will not automatically set the hospitalization to Done after payment. This allows the clinic to take interim payments during a hospitalization while the appointment is still active.
When the stay is truly finished, the team can manually set the hospitalization to Done after the discharge date or when care is complete.
Best Practices
- Always enter a checkout date and time, even if it is an estimate.
- Use hospitalization instructions for repeated care tasks.
- Use owner-supplied instructions for food or medicine brought from home.
- Record administrations as they happen.
- Add condition checks with vitals, symptoms, notes, and documents when the patient's status changes.
- Use one-time charges only for items that are not part of the scheduled hospitalization plan.
- Use linked appointments for related work that should be included during discharge.
- Let Ubik calculate hospitalization instruction quantities from recorded administrations.
Hospitalization workflows are easier to manage when the plan, the care record, and the discharge process all stay connected. Ubik gives the team one workflow from admission through payment, while still allowing the clinic to adjust the plan as the patient changes.