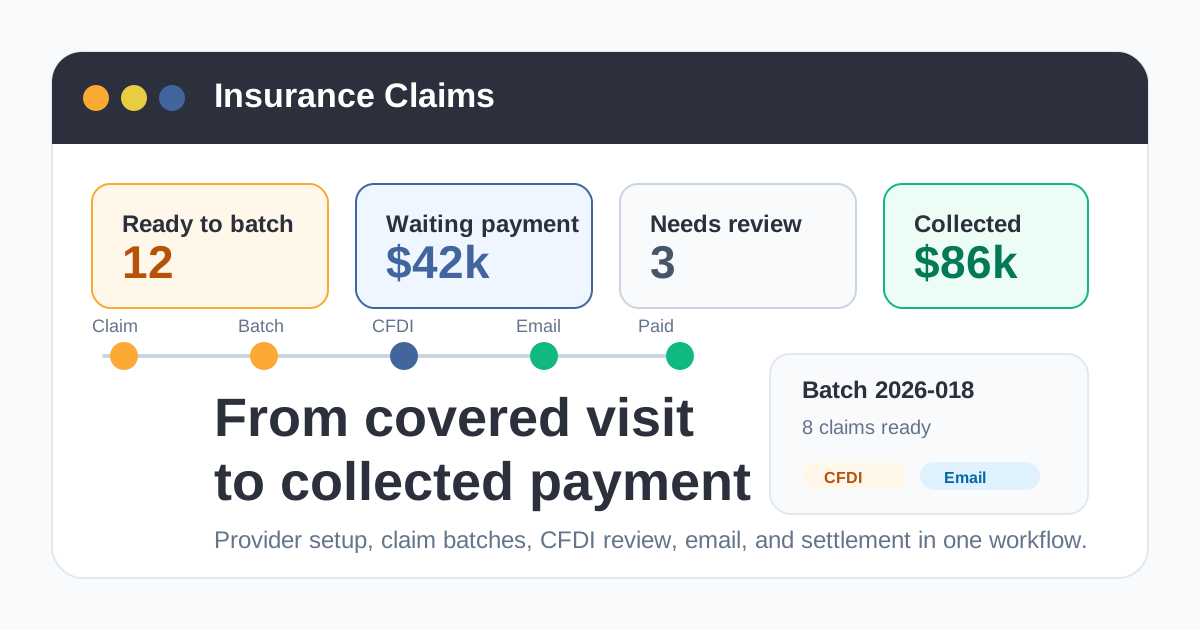
Insurance Claims in Ubik: From Covered Appointment to Collected Payment
Insurance work can be one of the messiest parts of running a clinic.
The appointment is real. The services and inventory are real. But the person paying may not be the customer standing in front of reception. The clinic has to track an authorization, the insurer's allowed amounts, provider emails, CFDI details, pending payment, partial payment, and any difference between the clinic price and what the insurer agreed to pay.
Ubik's new Insurance Claims workflow turns that moving target into a simple process your team can follow from start to finish.
Instead of keeping insurer work in notebooks, spreadsheets, inboxes, and memory, your clinic can manage it from one place: provider setup, coverage, appointments, claim batches, CFDI review, provider email, payment collection, and reporting.
What This Simplifies
Insurance claims are not hard because one step is difficult. They are hard because the work is split across too many places.
Ubik brings the flow together:
- The clinic creates each insurance provider once.
- Each provider can have its own approved prices for services and inventory.
- A customer or pet can be linked to a policy.
- An appointment can be marked as waiting for insurance instead of normal customer payment.
- Multiple claims can be grouped into a batch.
- The batch can be reviewed for CFDI and sent to the provider by email.
- When payment arrives, the clinic records what was collected and closes the work.
The result is less chasing, fewer missed claims, and a cleaner handoff between reception, accounting, and clinic leadership.
Before You Start
There are three things to set up before the first claim goes out.
1. Turn On Insurance Claims
An admin enables Insurance Claims for the account. Once it is active, the clinic will see the Insurance Claims workspace under Accounting.
This is where staff can manage claims, batches, providers, coverage, and insurance stats.
2. Complete Your Clinic's SAT Data
Before issuing CFDI documents for insurer billing, make sure your clinic's SAT setup is complete in Account Settings.
That includes the clinic's tax profile, invoice series, issuer postal code, and the SAT certificate information required to issue CFDI. This only needs to be configured once, but it must be correct before the clinic submits CFDI documents.
If your accountant has specific rules for how insurer payments should be billed, confirm those rules before issuing production CFDI documents.
3. Prepare Your Services and Inventory for Billing
Insurance claims use the same services and inventory your clinic already uses in Ubik.
The clinic does not need to create a second catalog for insurance. Instead, each insurer can have its own allowed amount for the existing items. That means your normal clinic price stays intact, while the insurance claim stores what that provider agreed to pay.
Step 1: Create the Insurance Provider
Go to Accounting > Insurance Claims > Providers and add the insurer.
Enter the basics:
- Provider name
- Claims email
- Contact phone, if useful
- RFC and billing recipient details
- Default rule for price differences
The price difference rule tells Ubik what to do when your clinic price is higher than the insurer's allowed amount:
| Option | What It Means |
|---|---|
| Review difference | Keep the difference in the insurance queue until someone decides what to do |
| Write off difference | Once the insurer pays its allowed amount, write off the remaining difference |
| Customer owes difference | Once the insurer pays its allowed amount, move the remaining difference to normal customer balance |
Most clinics should start with Review difference until they are confident each provider's rules are correct.
Step 2: Set the Provider's Allowed Prices
Open the provider and add fee schedule lines.
For each line, choose the real Ubik item:
- A service, such as a consultation
- A service render, if the provider prices that specific render
- An inventory item, such as medication or supplies
- A custom claim line, only when the item does not live in the normal catalog
Then enter the allowed amount. This is the amount the insurer usually agrees to pay for that item.
For example:
| Clinic Item | Normal Clinic Price | Insurer Allowed Amount |
|---|---|---|
| General consultation | $650 MXN | $500 MXN |
| Injection medication | $280 MXN | $240 MXN |
| Home visit service | $400 MXN | $350 MXN |
When a claim is created and charges are synced, Ubik copies the allowed amount onto the claim. That snapshot protects the claim from future catalog price changes.
Step 3: Link the Policy to the Customer or Pet
Go to Coverage and connect the insurer to the customer and pet.
This is the clinic's record that says, "This patient is covered by this provider."
Add the details the insurer gave you:
- Customer
- Pet
- Insurance provider
- Policy number
- Member ID
- Insured name and phone, when different from the customer record
- Notes, if the clinic needs them for claim handling
If the provider calls and the customer or pet does not exist yet, create them first, then come back and finish the coverage.
Step 4: Create or Link the Claim on the Appointment
When the insurer schedules a visit, create the appointment the same way your team normally does.
Then add the insurance claim from the appointment or from the Insurance Claims workspace:
- Select the customer and pet.
- Choose their coverage.
- Link the appointment.
- Add the authorization ID if the insurer provided one.
- Add any claim notes your team needs.
The claim is now connected to the appointment, the patient, the provider, and the policy.
Step 5: Complete the Appointment and Mark It Pending Insurance
The medical visit does not change. Your team still records services, inventory, notes, and treatments in the normal appointment flow.
When the appointment is ready to leave clinic operations but should wait for insurer payment, mark it Pending insurance.
That status is important:
- Services and inventory are finalized.
- The appointment does not become normal customer debt.
- The claim can sync the actual charges from the appointment.
- Accounting can keep working the insurer side without losing the appointment.
This is the handoff from medical work to insurance collection.
Step 6: Review the Claim
In Accounting > Insurance Claims, open the claim.
Ubik shows the appointment charges beside the insurer's allowed amounts. Review:
- Patient and provider
- Authorization ID
- Appointment date
- Clinic total
- Allowed total
- Difference, if there is one
- Missing provider prices
- Items that still need SAT billing data
If something changed after the claim was already billed or sent, Ubik flags the claim for review so accounting can decide what to do before collecting.
Step 7: Create a Batch
Most clinics do not send every insurance claim one by one. They collect a handful and send them together.
Select the ready claims and create a batch for that provider.
The batch gives your team one place to review:
- Which claims are included
- Appointment dates
- Patients
- Authorization IDs
- Allowed totals
- Total amount expected from the insurer
If another ready claim should be included, add it to the existing batch before sending.
Step 8: Review and Submit the CFDI
Before sending the batch to the insurer, review the CFDI draft in Ubik.
Make sure:
- The clinic's SAT data is complete.
- The provider's billing recipient data is complete.
- Every service or inventory line has the required SAT billing data.
- The amounts match what the clinic expects to bill the insurer.
When everything looks right, issue the CFDI from the batch.
This step stays explicit. Ubik helps organize the information, but the clinic chooses when the CFDI is ready to submit.
Step 9: Send the Provider Email
After the batch is reviewed, send the provider email from the batch.
The email includes the information the insurer needs to process payment, such as:
- Clinic name
- Batch number
- Provider name
- Claim list
- Patient names
- Appointment dates
- Authorization IDs
- Allowed amounts
- Batch total
- CFDI reference, when available
Ubik sends the email to the provider's claims email and copies the clinic's account email, so the clinic has a record of what was sent.
Step 10: Record Collection
When the insurer pays, open the claim or batch and record the payment.
Ubik updates the balance and status so your team can see what is still waiting, what was partially paid, and what is closed.
If the insurer paid less than the clinic's normal price, the provider's price difference rule applies:
- Review difference keeps the difference in the insurance queue.
- Write off difference closes the remaining difference as an insurance adjustment.
- Customer owes difference moves the remaining difference to the customer's normal unpaid balance.
That keeps insurance collections clean without mixing every insurer short payment into normal customer debt.
What Your Team Gets Back
Insurance work is not just paperwork. It is time, focus, and cash flow.
With Insurance Claims in Ubik, the clinic gets a cleaner process:
- Reception can create or link the claim when the appointment is scheduled.
- Doctors and technicians keep using the normal appointment flow.
- Accounting can see what is ready, what was sent, what has CFDI, and what still needs payment.
- Owners can see totals, balances, adjustments, and provider performance without building a spreadsheet.
The complex part of the job becomes visible, repeatable, and easier to hand off.
Schedule a Free Demo or Send Us a Message
We would love to show you how Insurance Claims can help your clinic manage insurer billing from appointment to collected payment.
- WhatsApp: 1-612-383-6374
- Website: goubik.com
- Email: [email protected]
- Or send us a message on Facebook